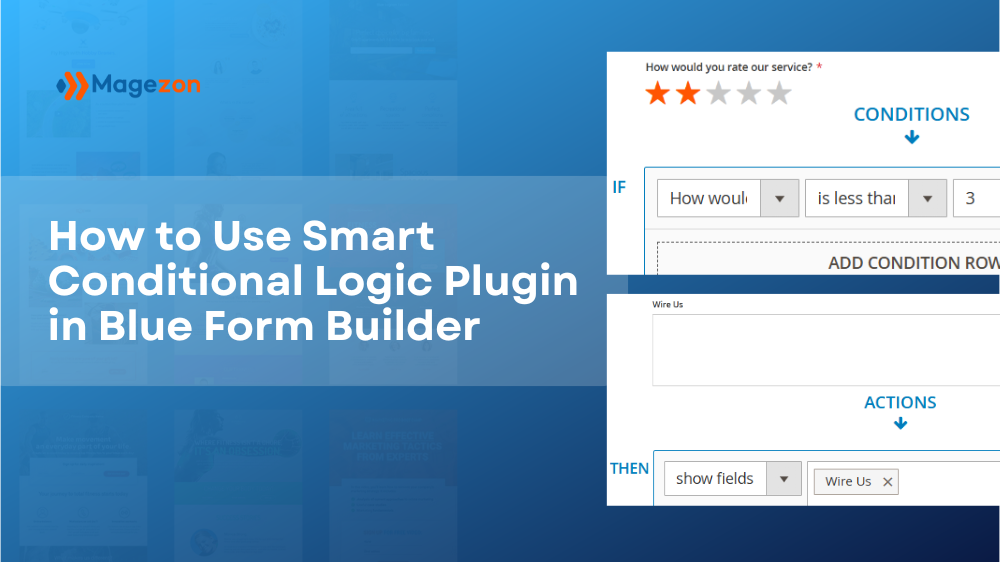
Smart Conditional Logic is a plugin of Magento 2 Blue Form Builder. It ensures that your forms are smart, relevant and effective, save you and your users time and collect the data you want. With this feature, your forms will dynamically change based on what customers fill out.
You can use Smart Conditional Logic plugin to:
● Show/hide fields
● Send emails to right people in your company
● Redirect to another page after form submission
● Set value of other fields
Access Plugin
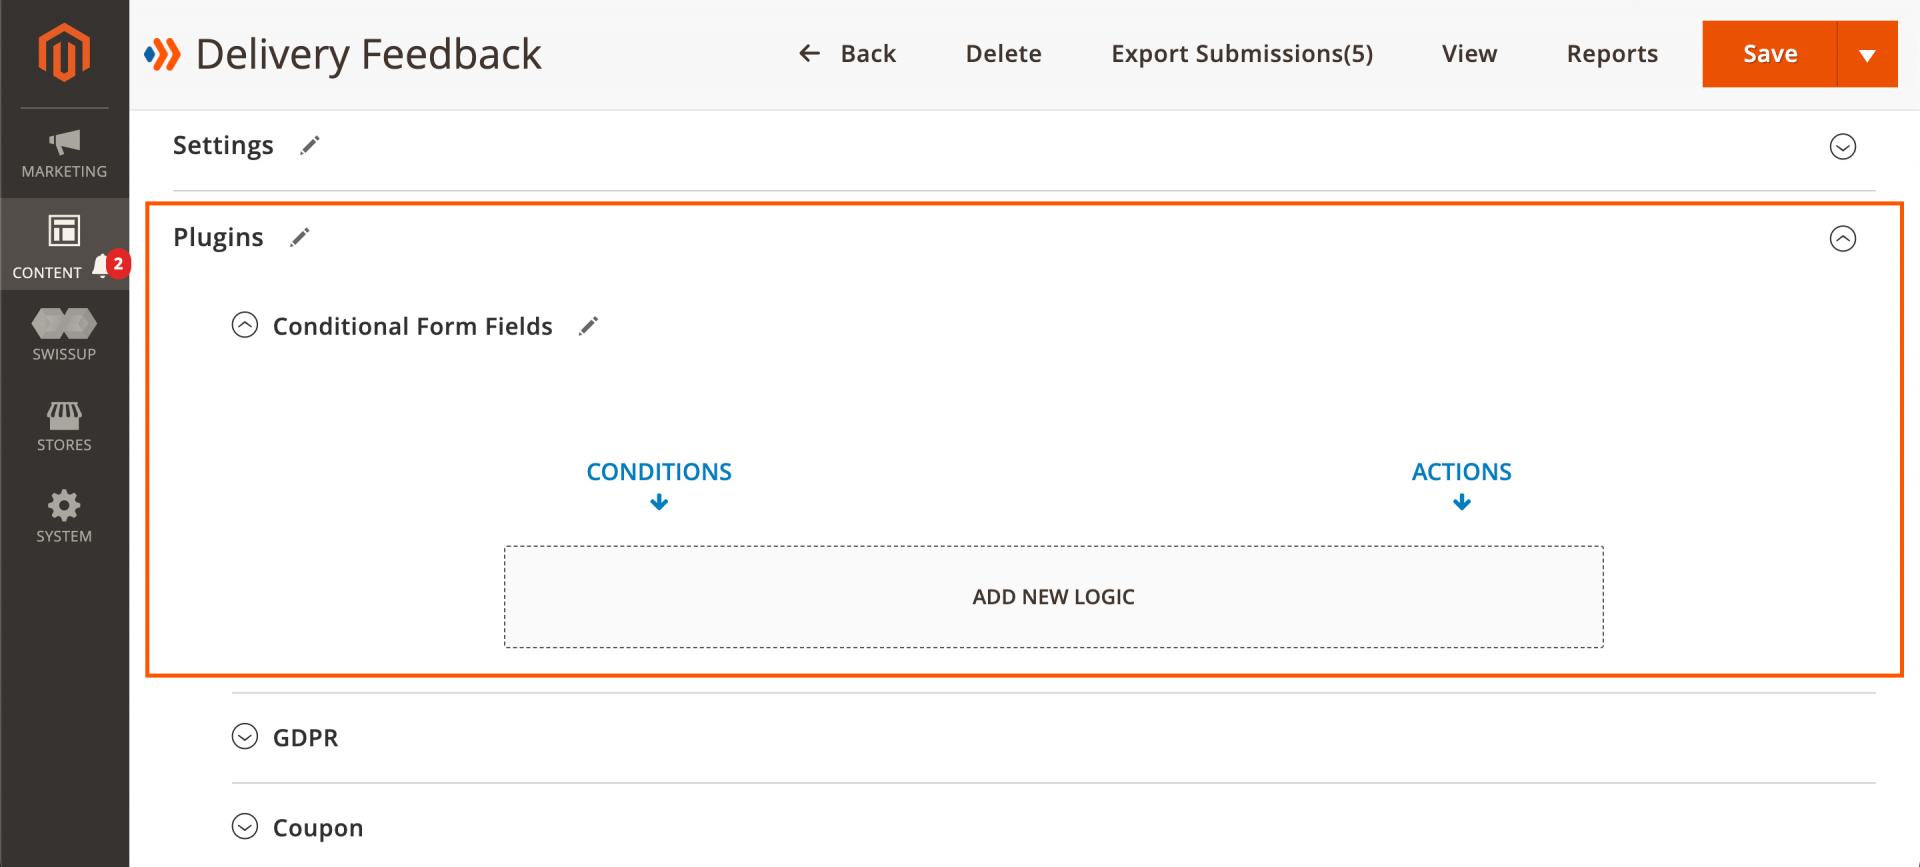
After installing our plugin, you can find it in the settings of every form. Open a form’s settings. Then click on the Plugins > Conditional Form Fields section.
How to Use
In the Conditional Form Fields section, click on ADD NEW LOGIC to add a new conditional logic. There are two columns: Conditions and Actions.
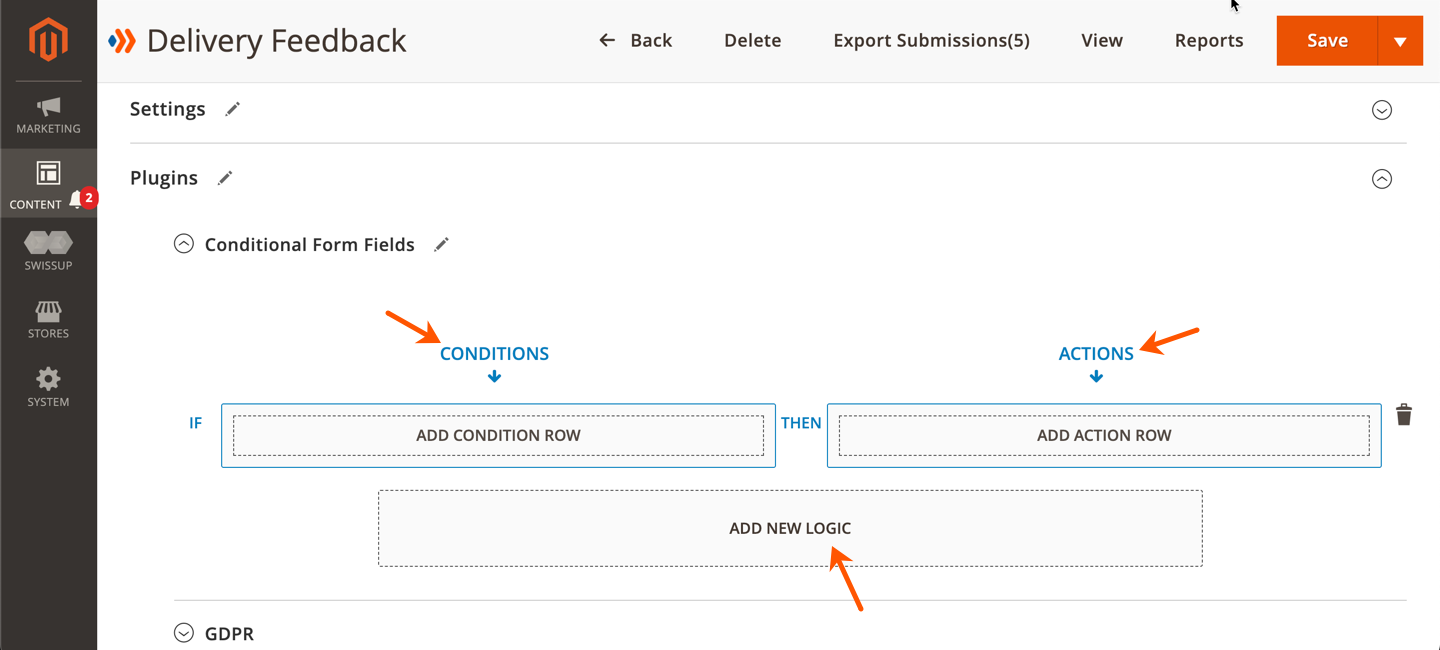
You can add more conditional logics by clicking ADD NEW LOGIC or delete a logic by clicking the recycle bin icon.
1. Conditions
In this column, you set the conditions for an action to happen. Click on ADD CONDITION ROW to add a new condition. Then you will see this:

You can add more conditions by clicking ADD CONDITION ROW or delete a condition by clicking the red cross icon:
- In the first field, you will select the form field you want to make conditional from a drop-down menu. The form fields in the drop-down menu are listed by label (that you decide in their settings) and ordered based on their order in the form.
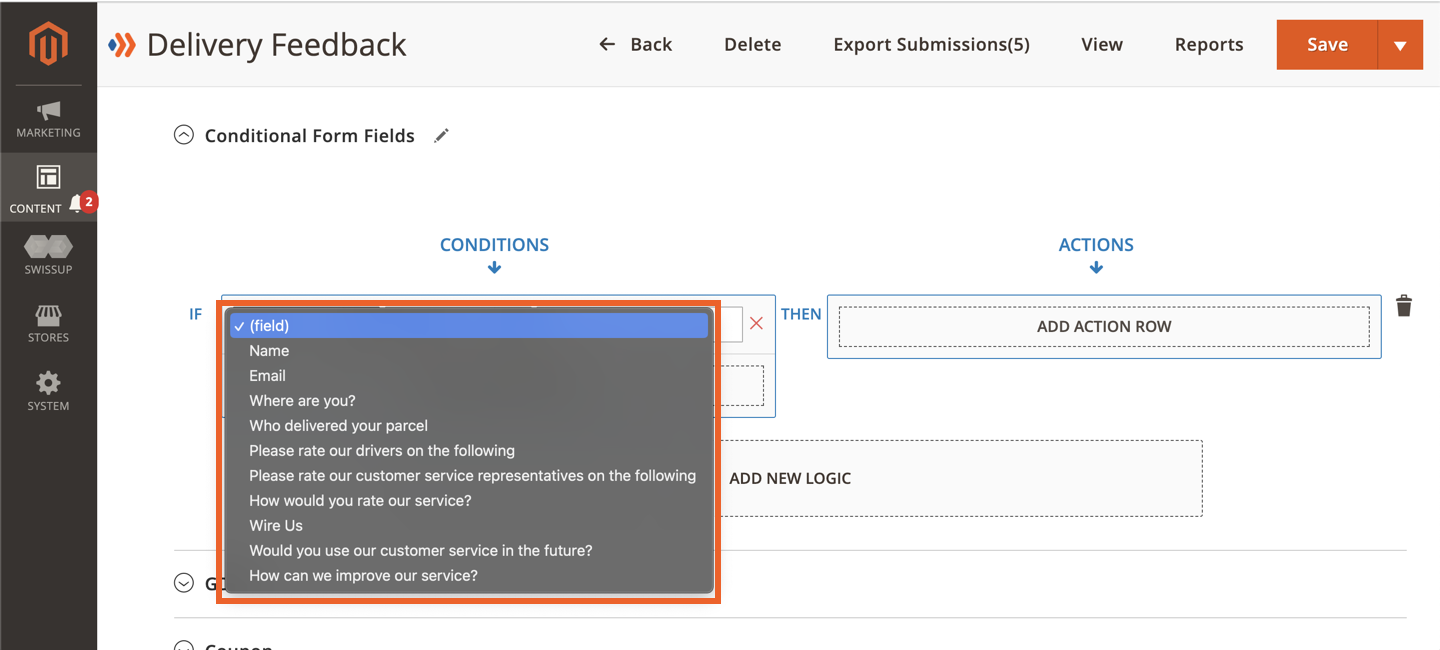
- The second field consists of all conditions that you can apply. Click on the drop-down button to see a drop-down list containing these conditions.
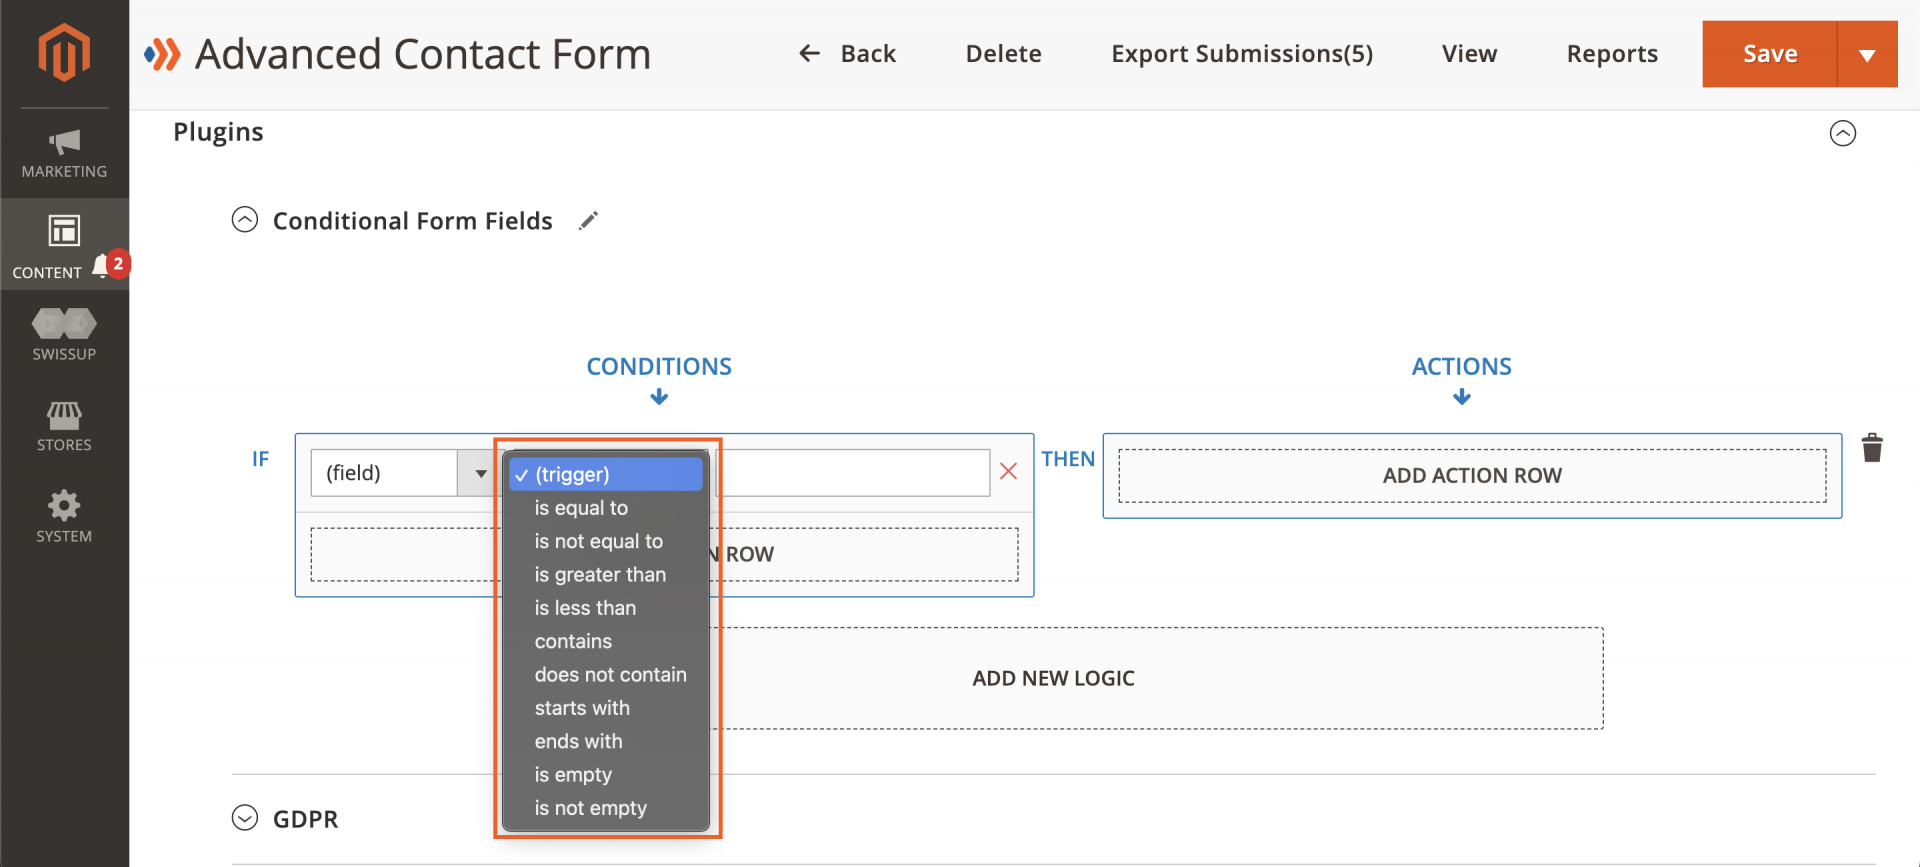
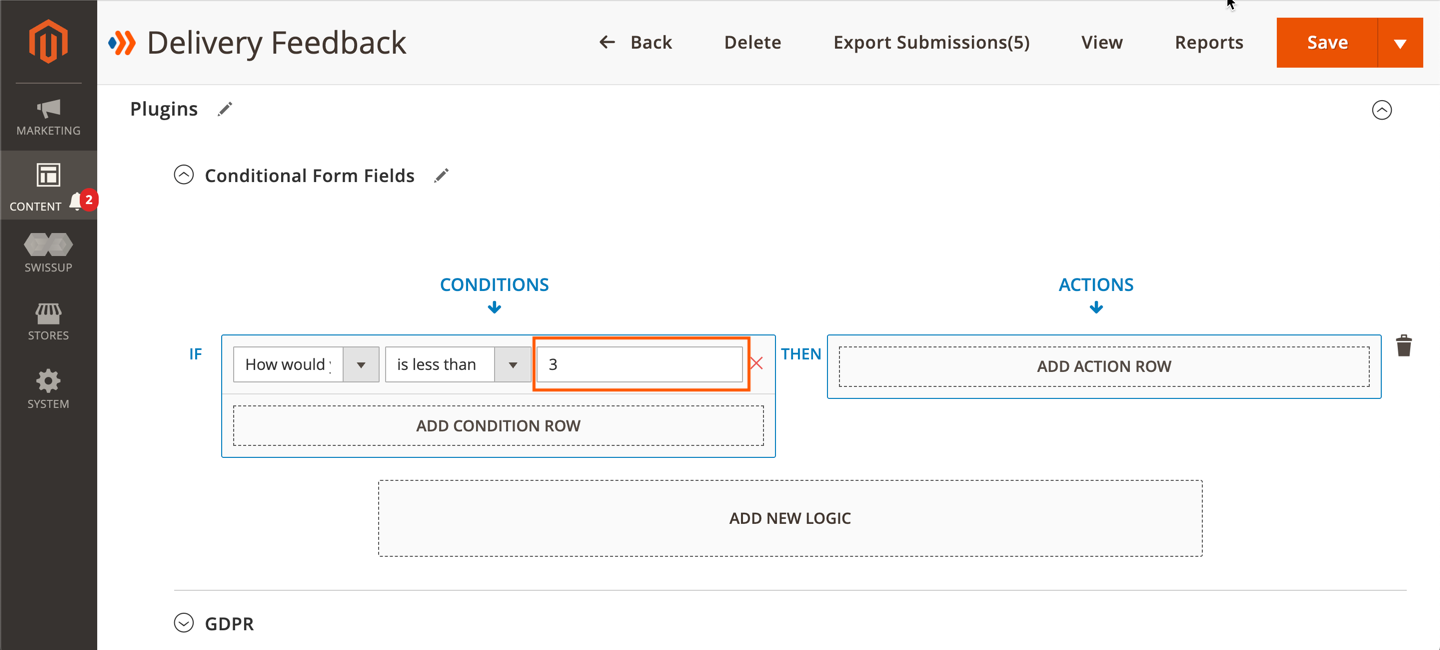
- The last field is where you enter a value for the condition:
If you add another condition, you will see the word AND between two conditions. Click on it and a drop-down menu will appear containing 2 options “And” and “Or”.
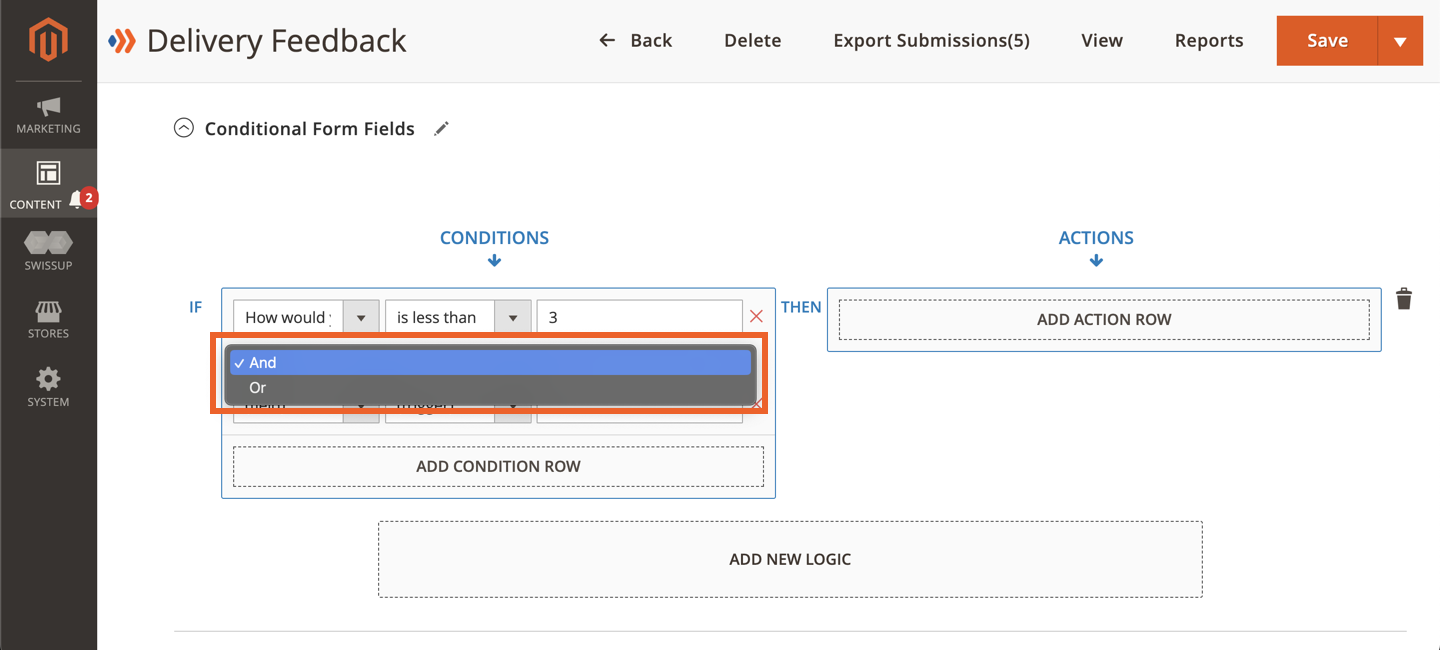
- Select “And”: an action will happen only if all the conditions are fulfilled.
- Select “Or”: an action will happen if any of the conditions are fulfilled.
2. Actions
In this column, you will decide an action to happen under specific conditions you’ve set.
Click ADD ACTION ROW to add a new action. You can add as many actions as you want. Or delete an action by clicking the red cross icon.

Select the action you want to apply from the drop-down menu. There are 5 actions as follows:
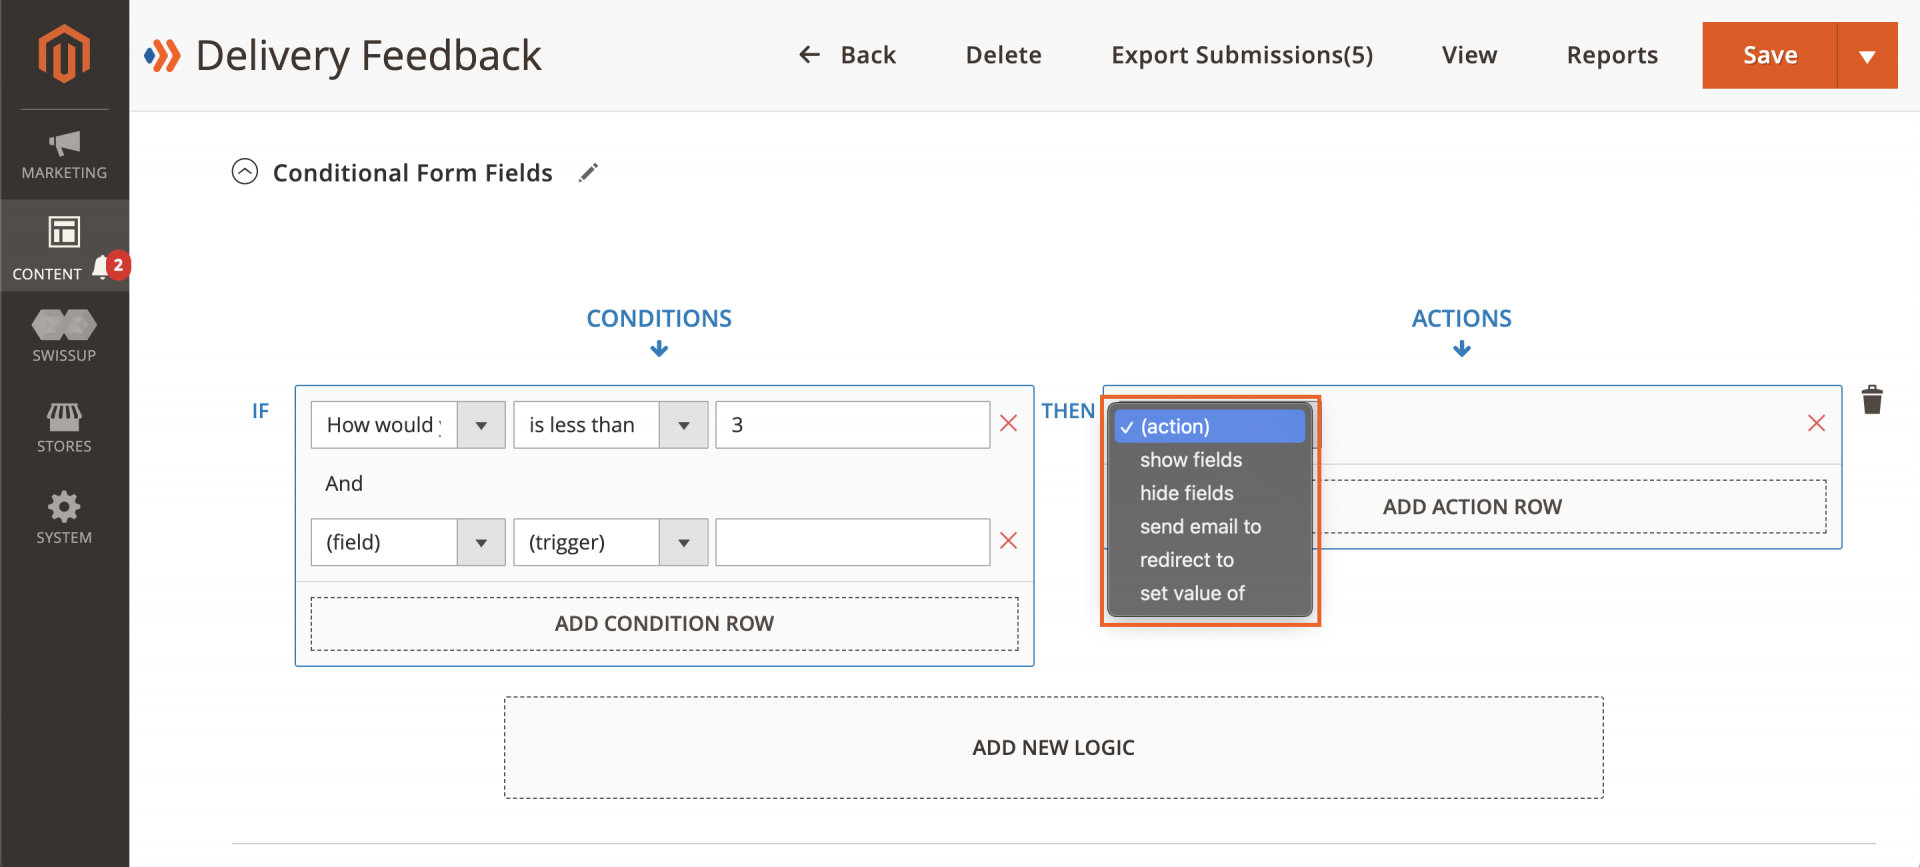
2.1. Show Fields
This action allows showing certain field(s) if the conditions are met.
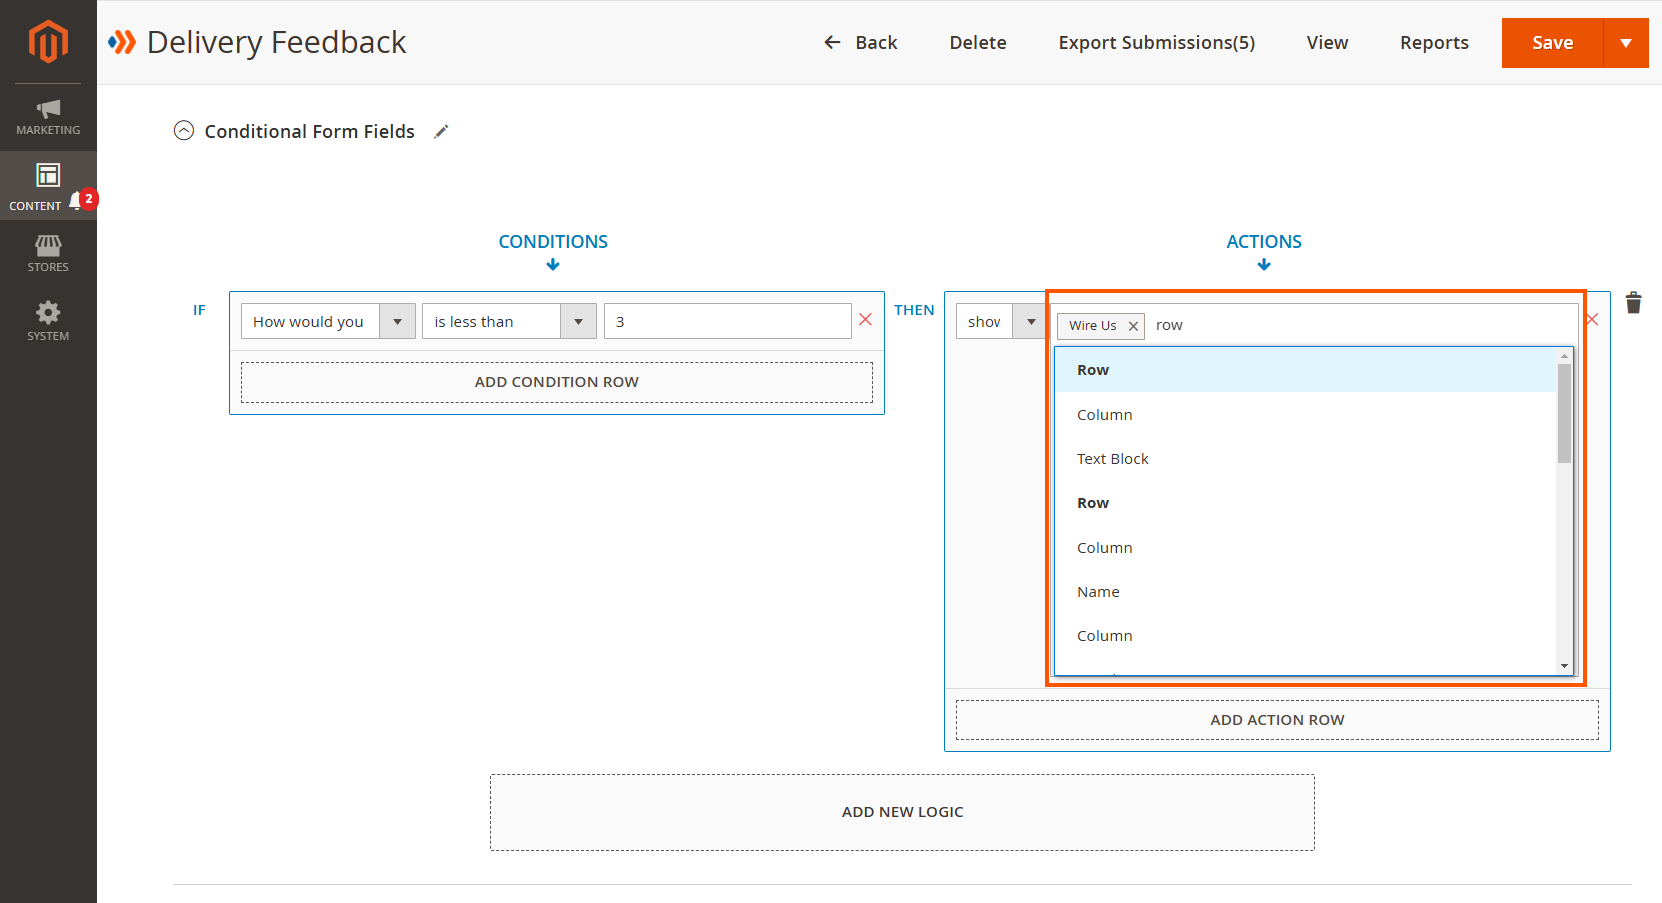
Select the fields you want to show. The form fields are listed by label and ordered based on their order in the form. You can select multiple fields at the same time.
Or find your wanted fields quickly by typing their names in the input. You can delete a form field by clicking the cross icon next to the field name.
Note:
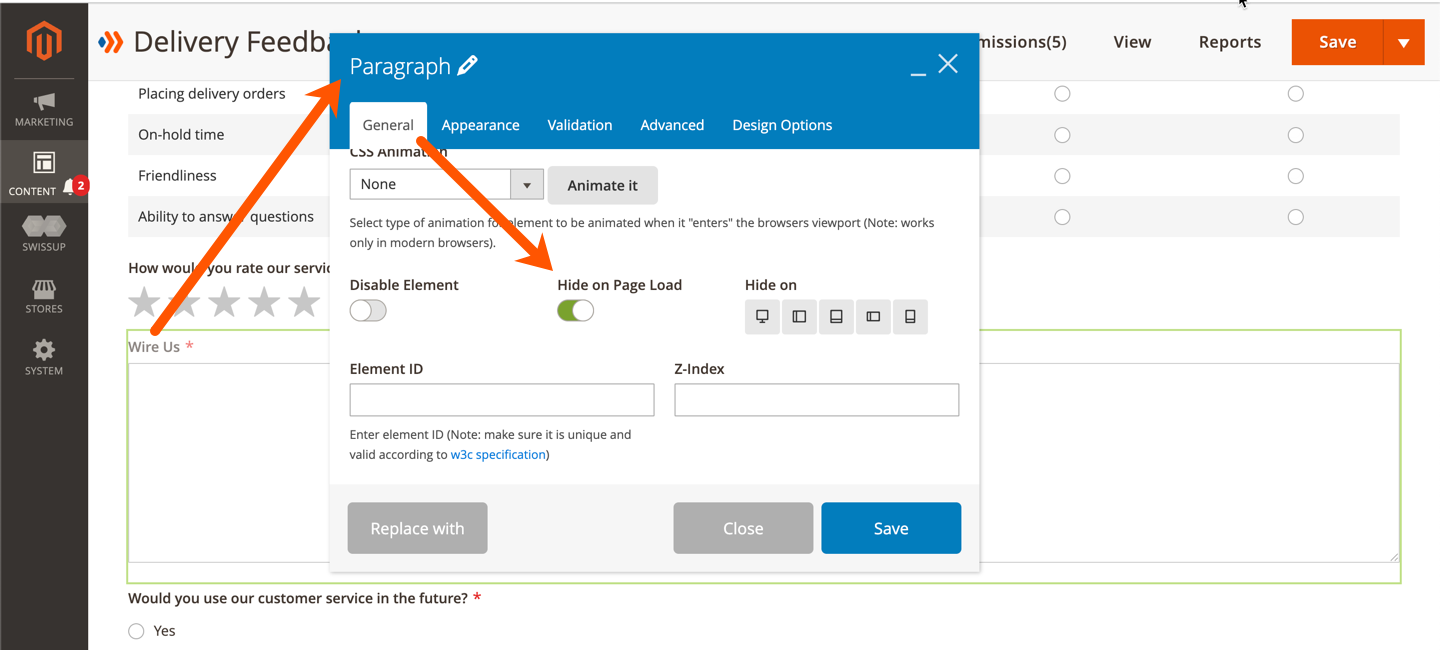
- For this action to happen, you first need to hide the fields you want to show from the frontend form. It means that customers can not see these fields on the frontend.
- To do that, open the Magezon Blue Form Builder section and open the settings of a field (in the below image, we will hide the “Wire Us” field).
- In the General tab, you will see the toggle button Hide on Page Load. Turn on the button to hide the field from the frontend form. Do the same with other fields you want to hide. The hidden fields will have their opacity reduced.
2.2. Hide Fields
Hide certain field(s) if the conditions are met.
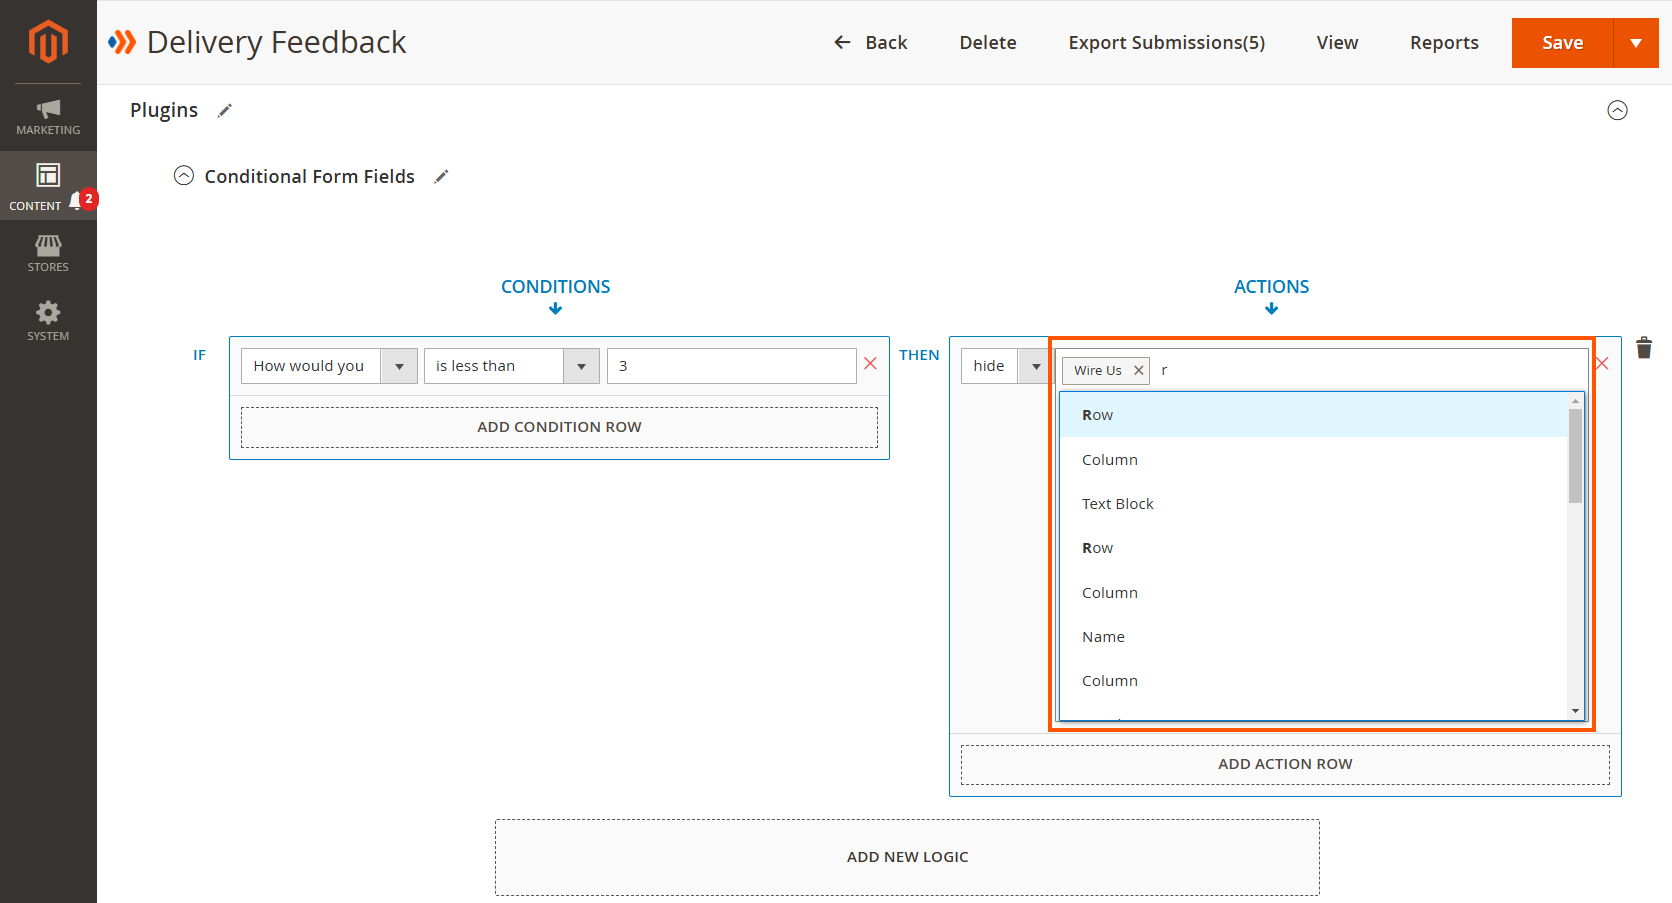
Select the fields you want to hide. The form fields are listed by label and ordered based on their order in the form. You can select multiple fields at the same time.
Or find your wanted fields quickly by typing their names in the input. Delete a form field by clicking the cross icon next to the field name.
2.3. Send Email to
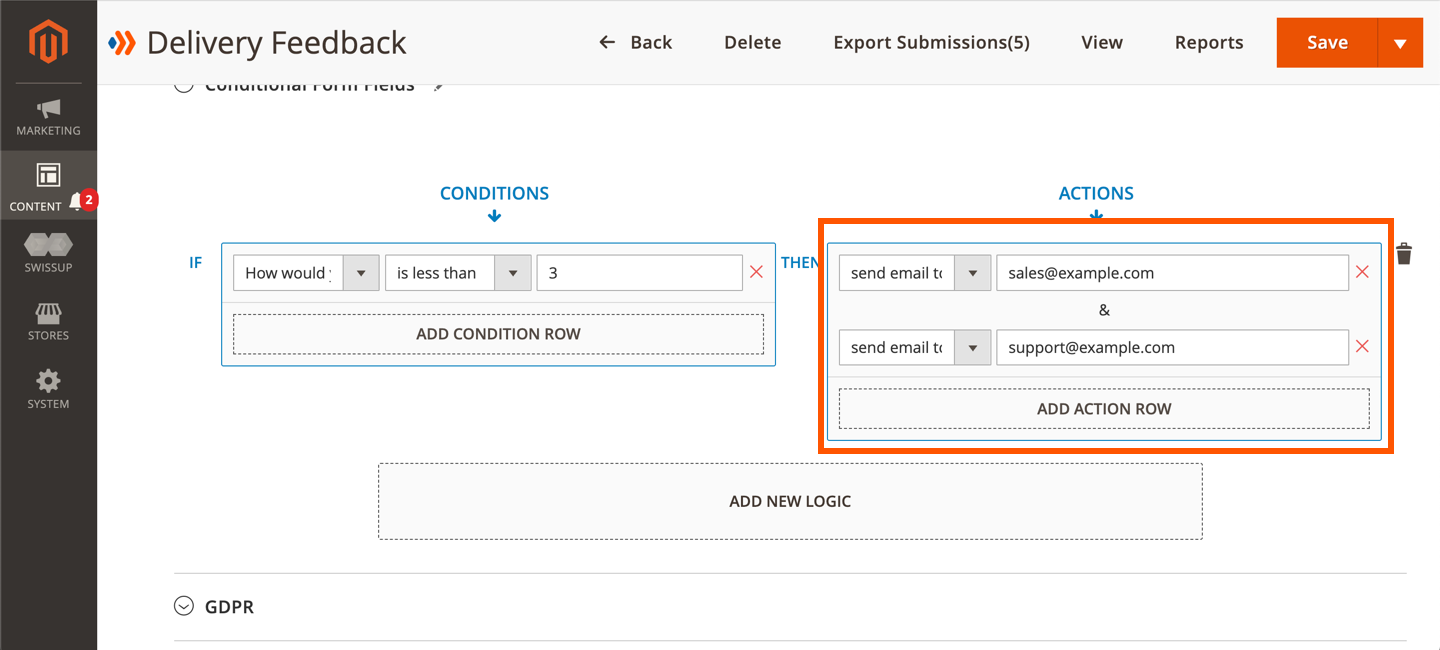
If certain conditions are met, notification emails will be sent to specific email addresses in your company after a customer submits the form.
If you select this action, a blank field will show up where you will enter your wanted email address. Note that you can enter only one email address in this field. If you want to add another email address, you need to add a new action.
2.4. Redirect to
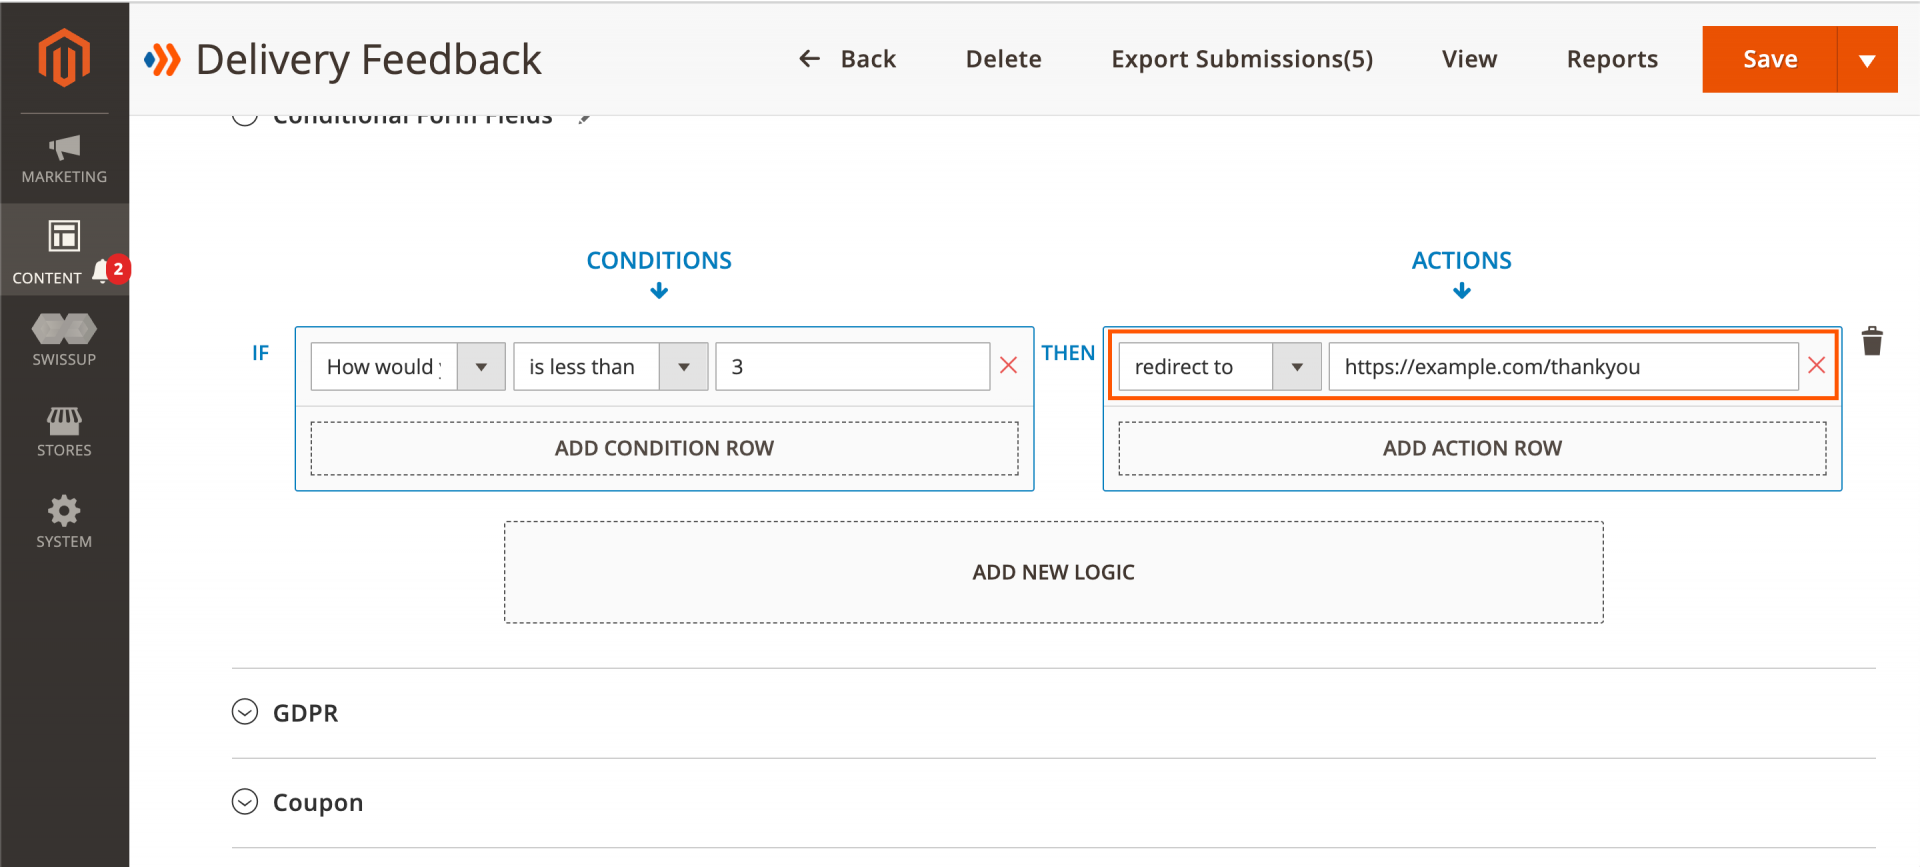
This allows you to redirect customers to any desired page after form submission. If you select this action, a blank field will show up where you will enter the page URL.
2.5. Set Value of
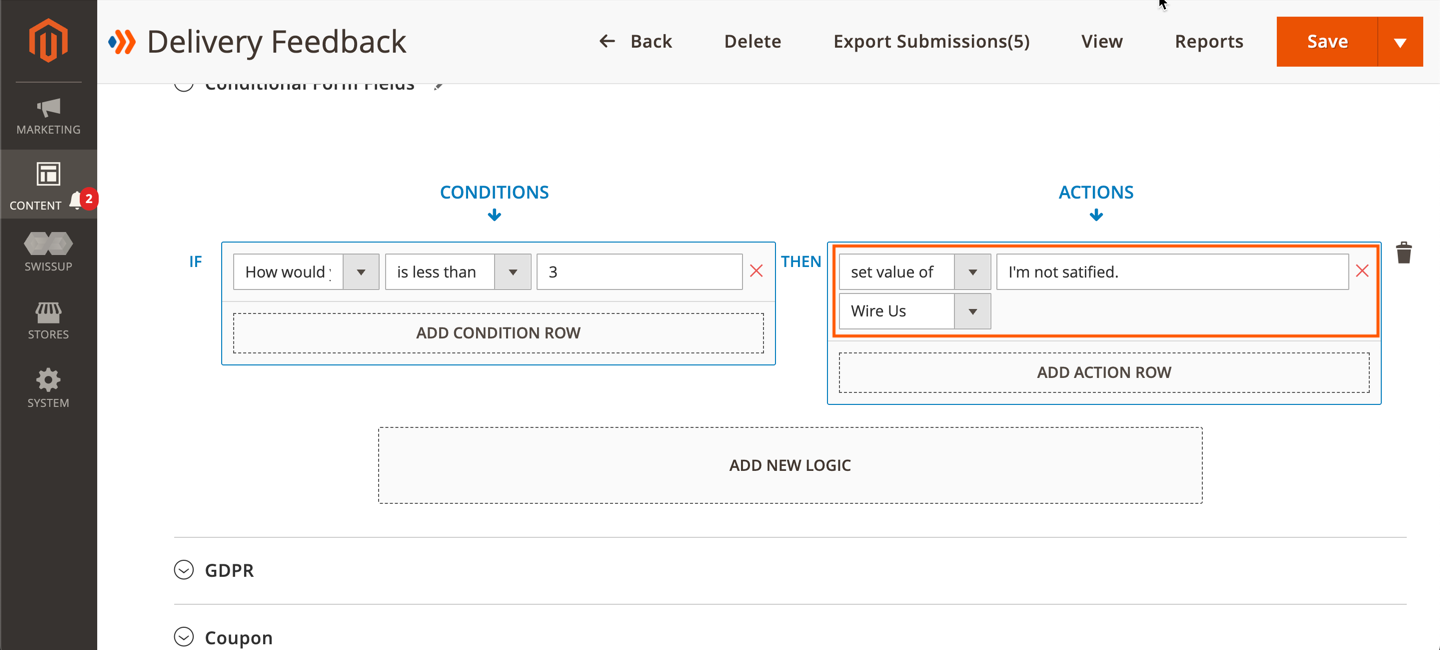
Based on what customers input in the form, specific fields will be automatically filled with the values you’ve already set in the backend.
When selecting this option, you need to:
- Select the field you want to be automatically filled out.
- Enter a value for the chosen field.
Conditional Logic With Special Fields
1. Multiple Choice fields
With multiple choice fields including Select, Multiple Select, Checkbox List and Radio List, you can set a value for each option and the value is separate from the label. Customers can only see the option label on the frontend. When setting a conditional logic for these fields, you would use the value instead of the label.
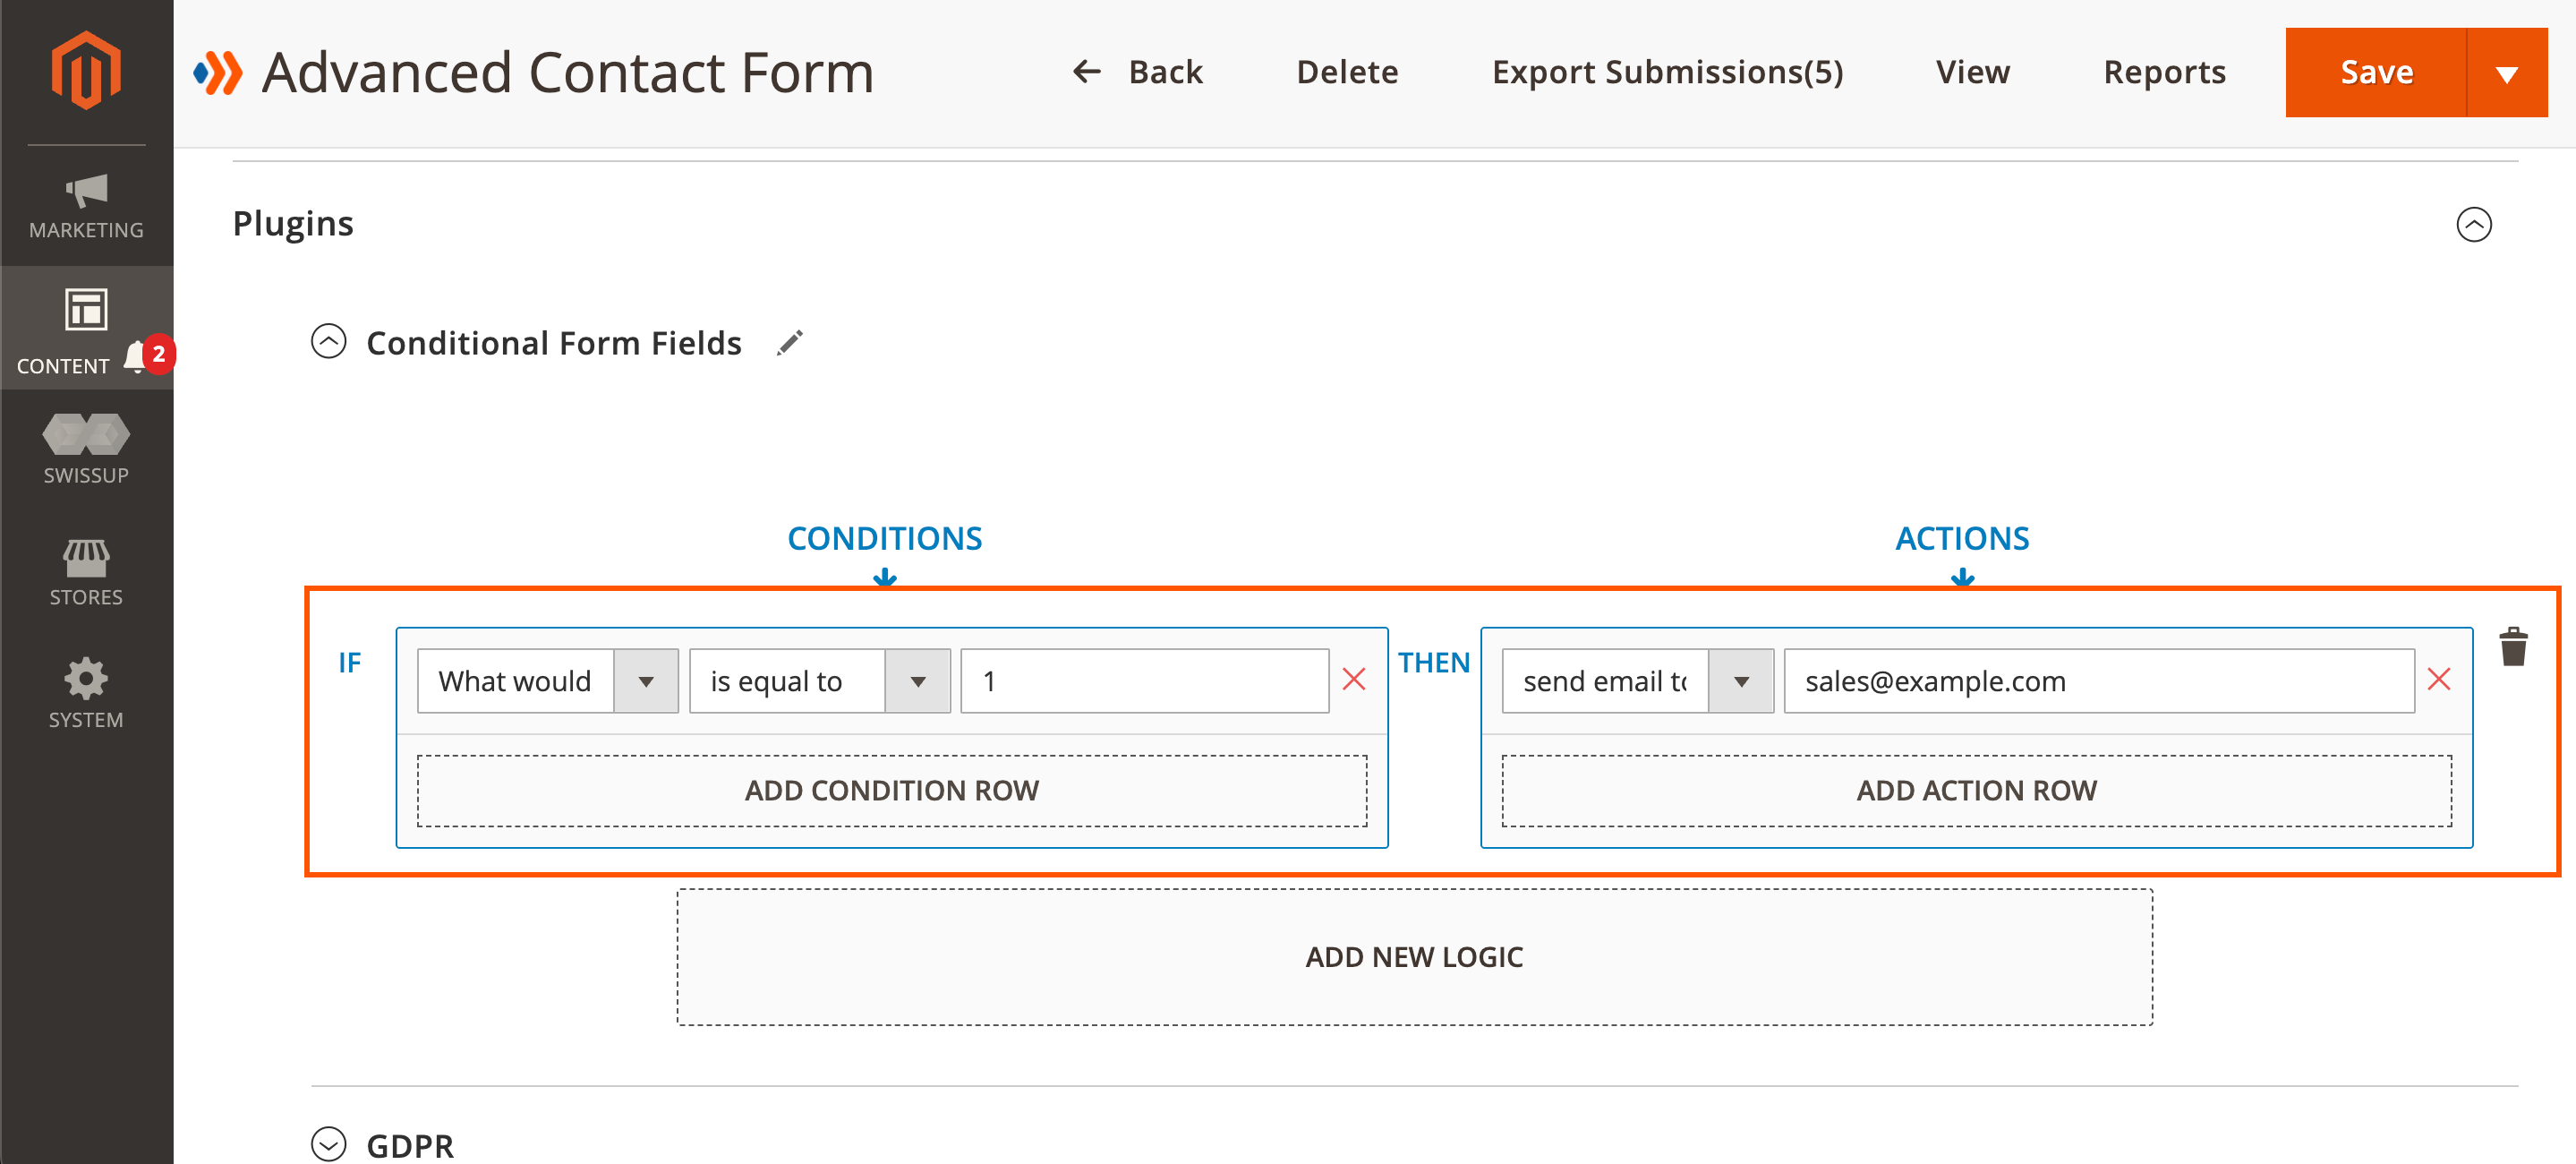
For example, here is the configuration of a radio list field labelled “What would you like to enquire about?” in the backend:
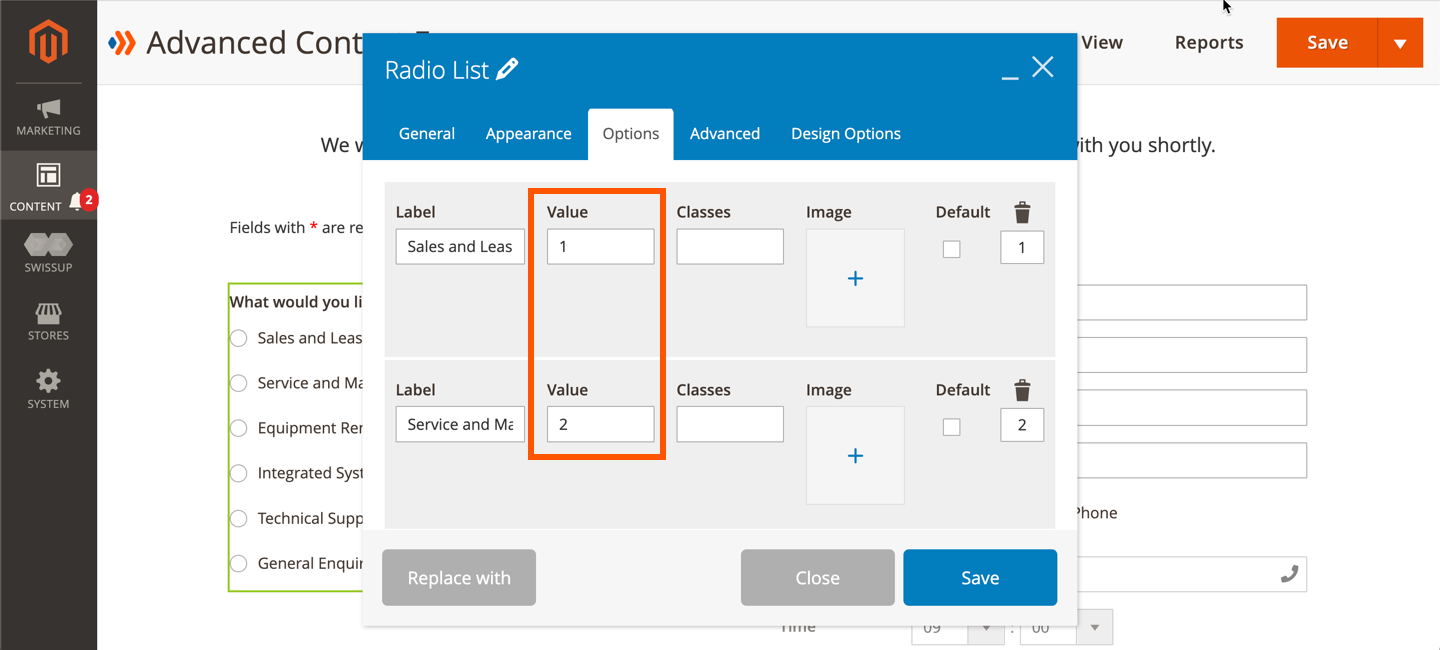
Each label has a value (in the above image, we set “1” for “Sale and Leasing” label, “2” for “Service and Maintenance” label).
We want to send email to [email protected] if customers select “Sale and Leasing”. The logic will look like this:
2. Subscribe Field
The “Subscribe” field is actually a single checkbox used for newsletter subscription. This is how it looks on the frontend:
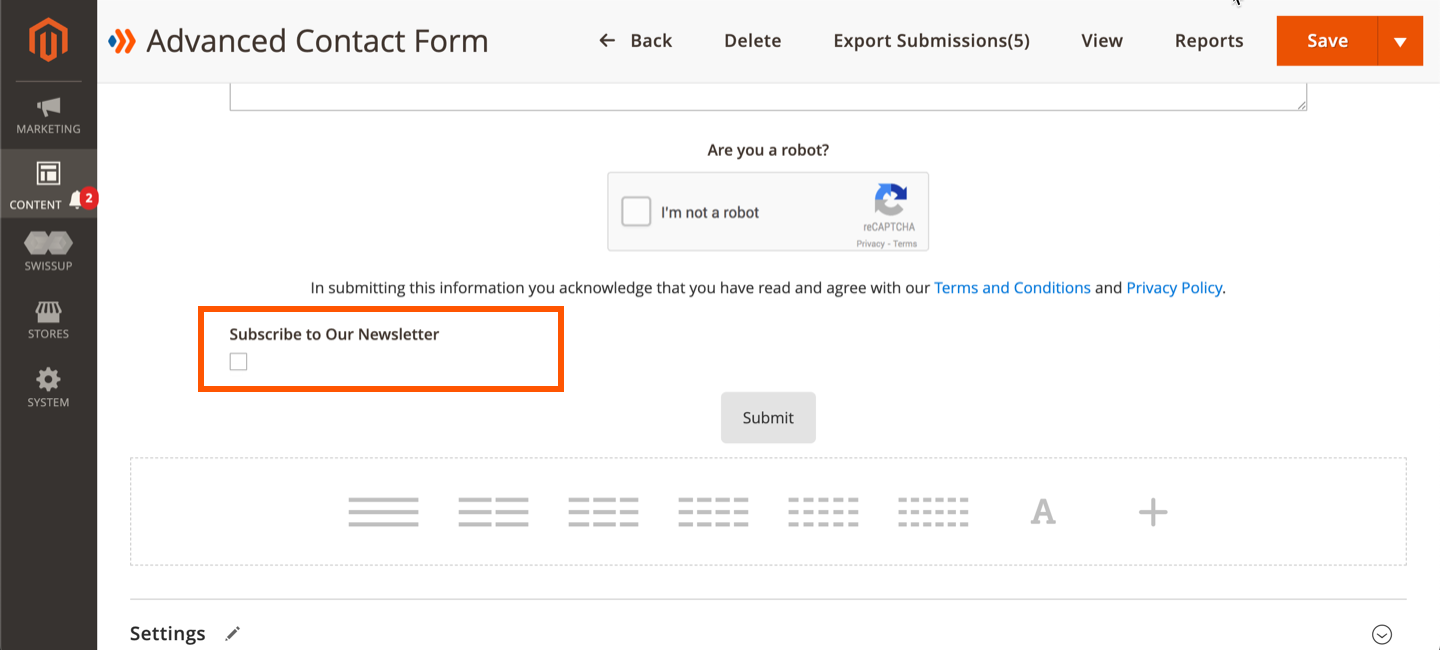
When setting up conditional logic for this kind of field, you would use “0” and “1” (“1” for ticked checkbox and “0” for non-ticked checkbox) or “Yes” and “No” (“Yes” for ticked checkbox and “No” for non-ticked checkbox).
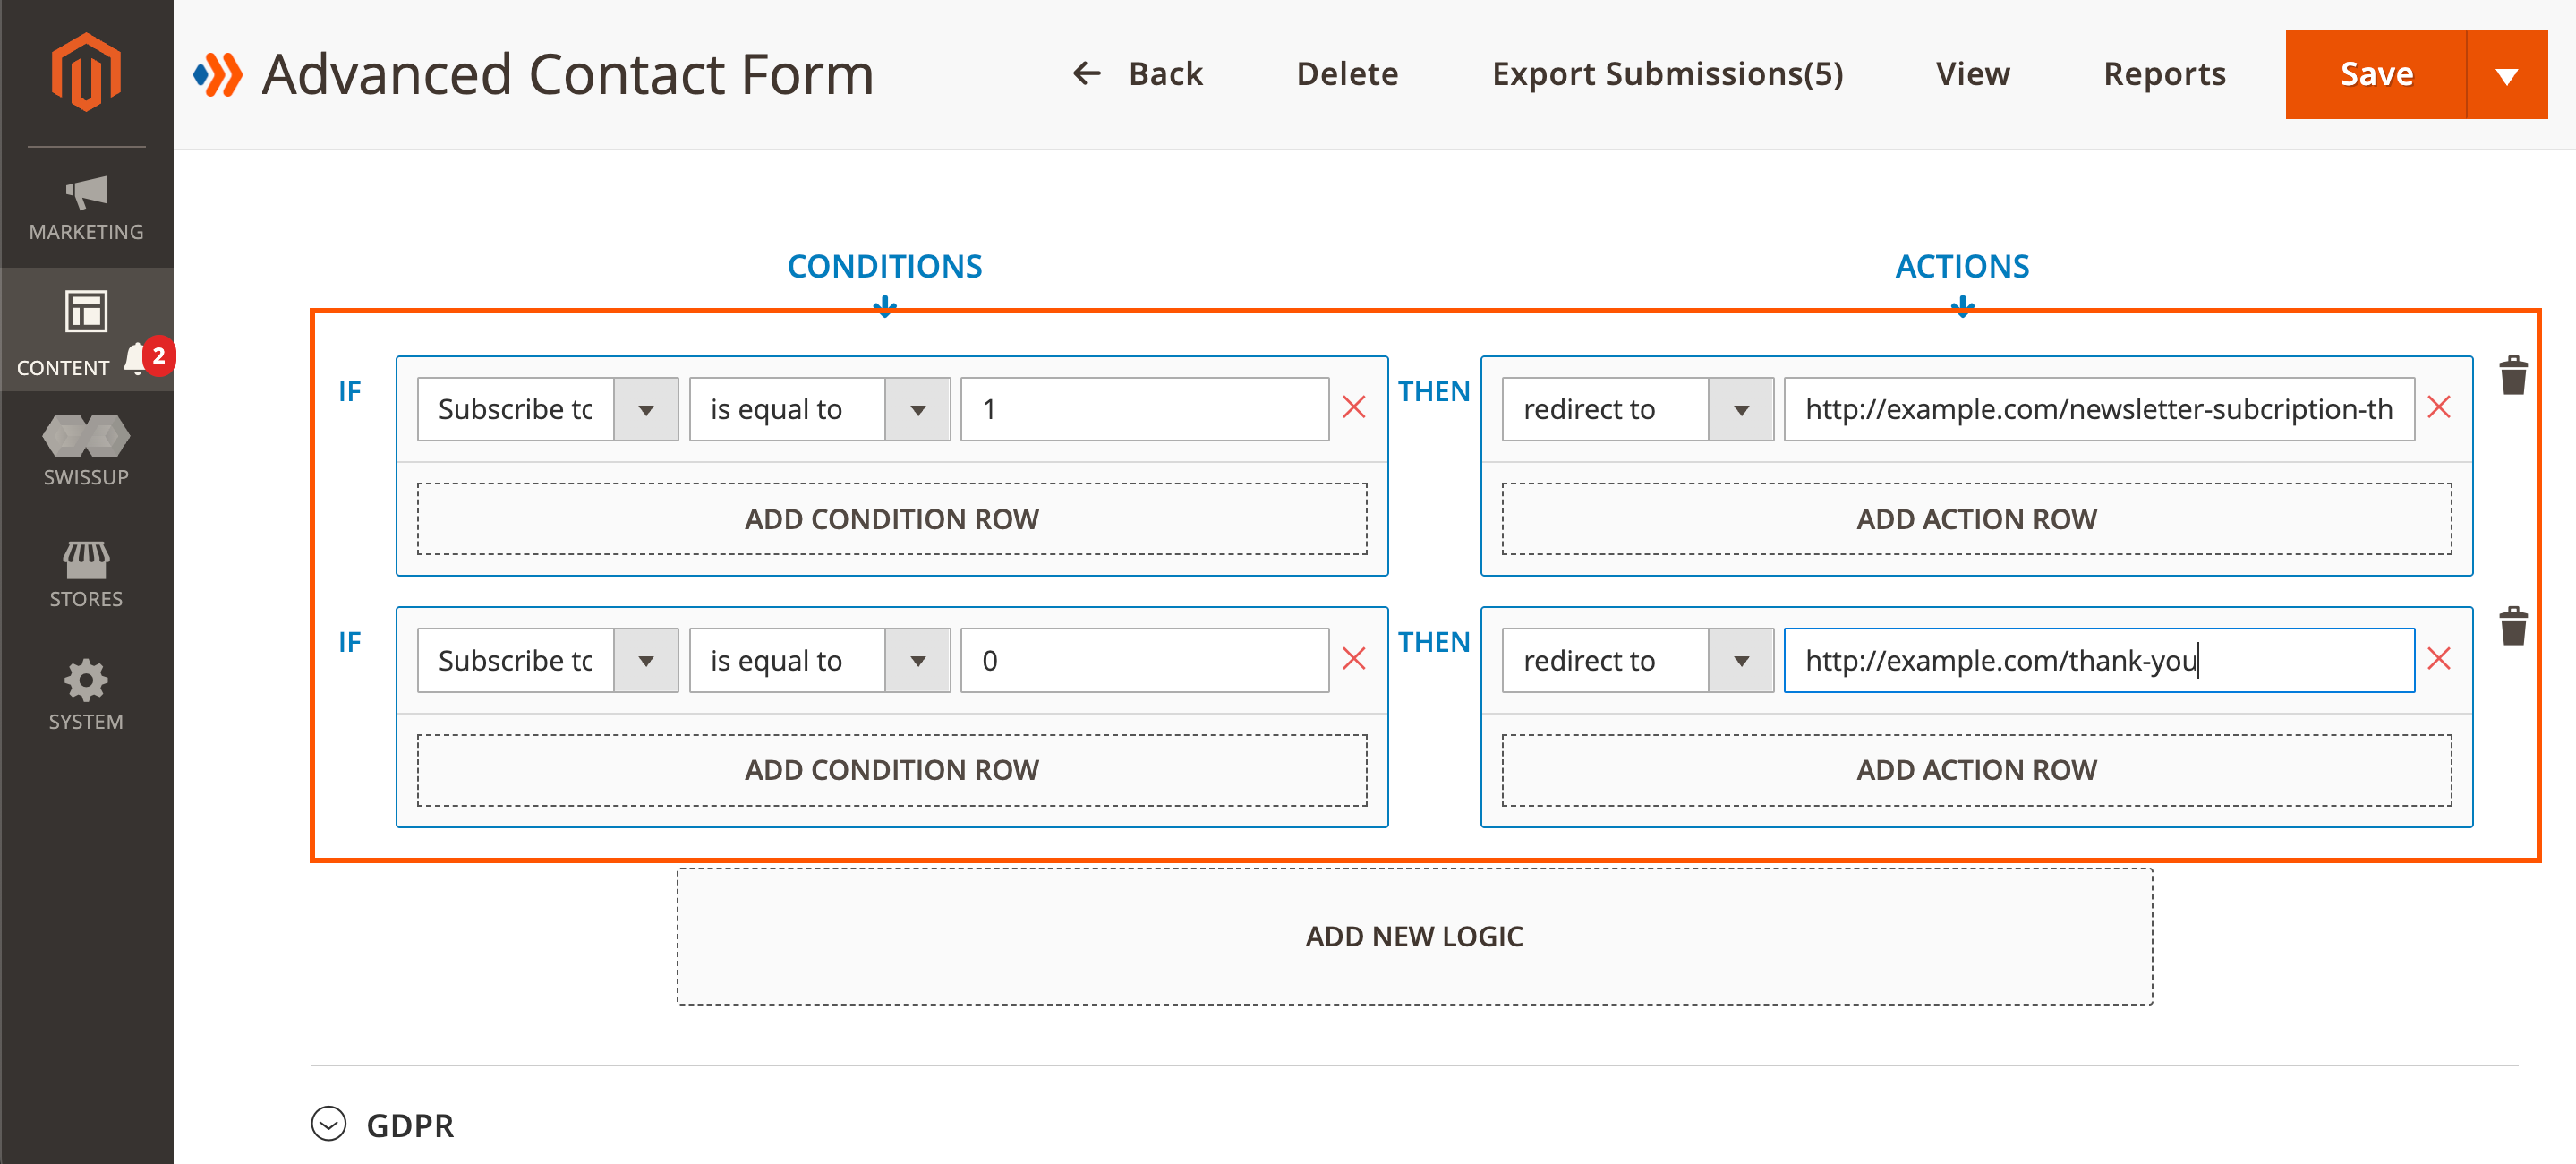
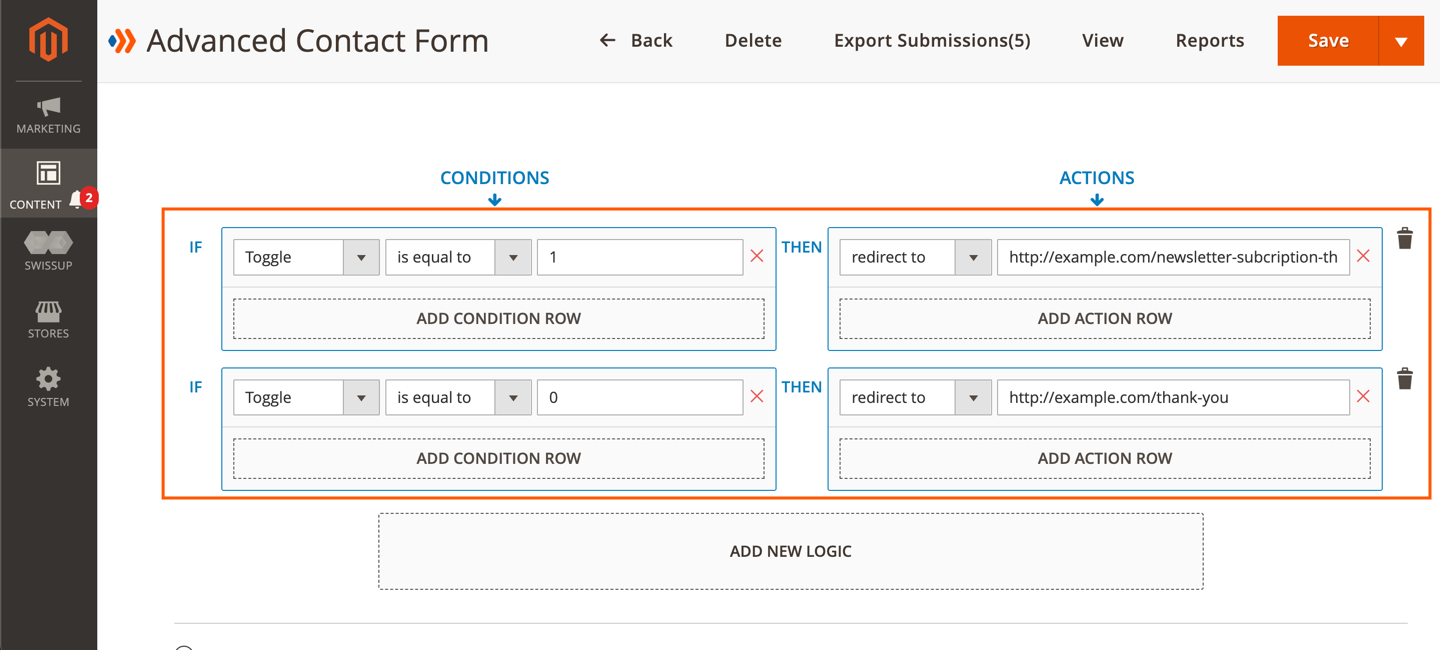
In the above image, the first logic is: IF Subscribe to Our Newsletter is equal to 1 THEN redirect to http://example.com/newsletter-subcription-thank-you. It means that if customers tick the “Subscribe” checkbox, they will be redirected to page “http://example.com/newsletter-subcription-thank-you” after form submission.
The second logic is IF Subscribe to Our Newsletter is equal to 0 THEN redirect to http://example.com/thank-you. It means that if customers do not tick the “Subscribe” checkbox, they will be redirected to page “http://example.com/thank-you” after form submission.
3. Toggle Field
This is how the field looks:
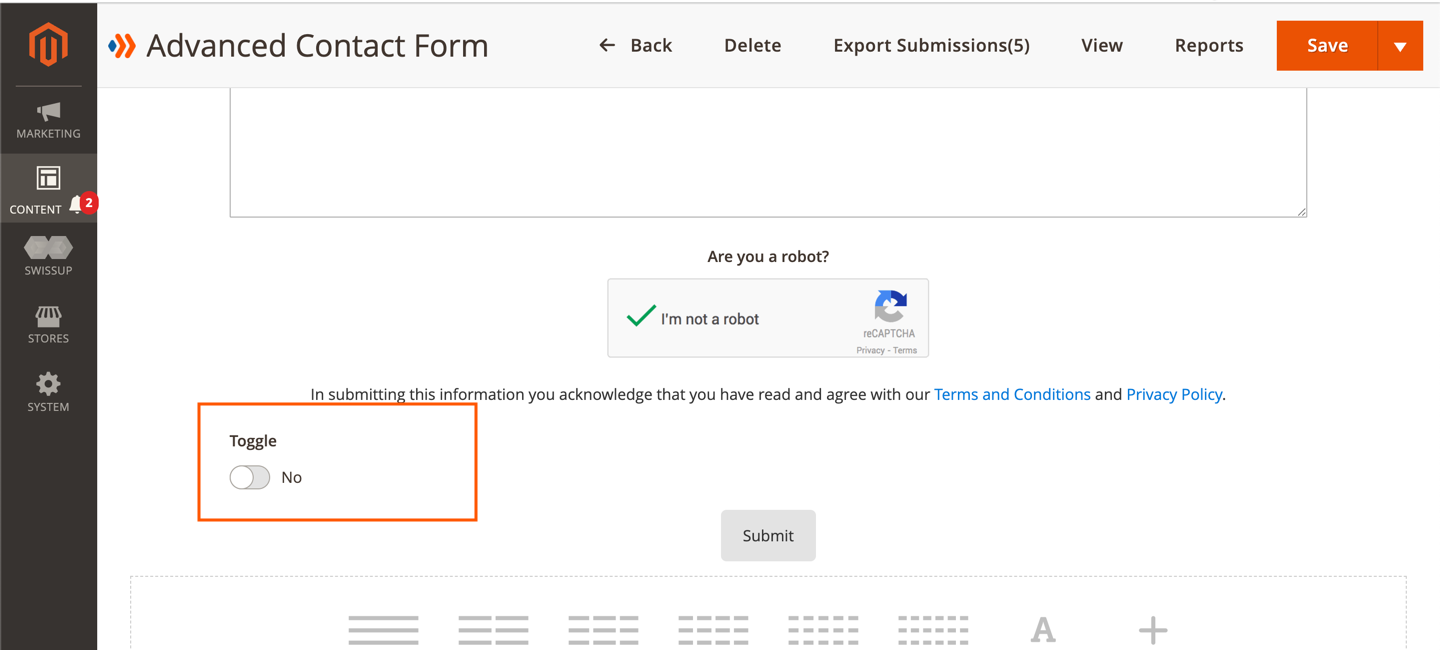
Similar to the “Subscribe” field, when using conditional logic for this kind of field, you would use either “0” and “1” (“1” for turned-on button and “0” for turned-off button) or “Yes” and “No” (“Yes” for turned-on button and “No” for turned-off button). The logic will be:
4. Single Checkbox Field
This field will look like this on frontend:
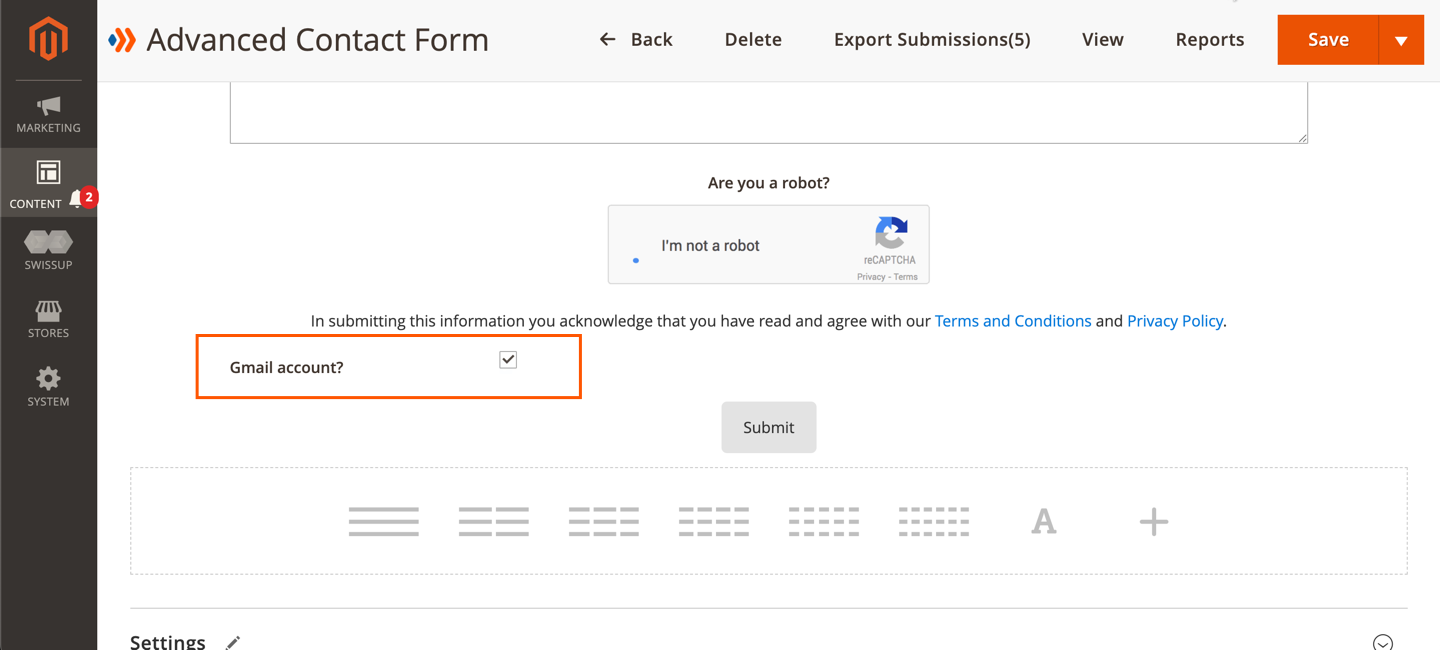
To make this kind of field conditional, you would use either “0” and “1” (“1” for ticked checkbox and “0” for non-ticked checkbox) or “Yes” and “No” (“Yes” for ticked checkbox and “No” for non-ticked checkbox).
Let’s look at the logic using “0” and “1” value:
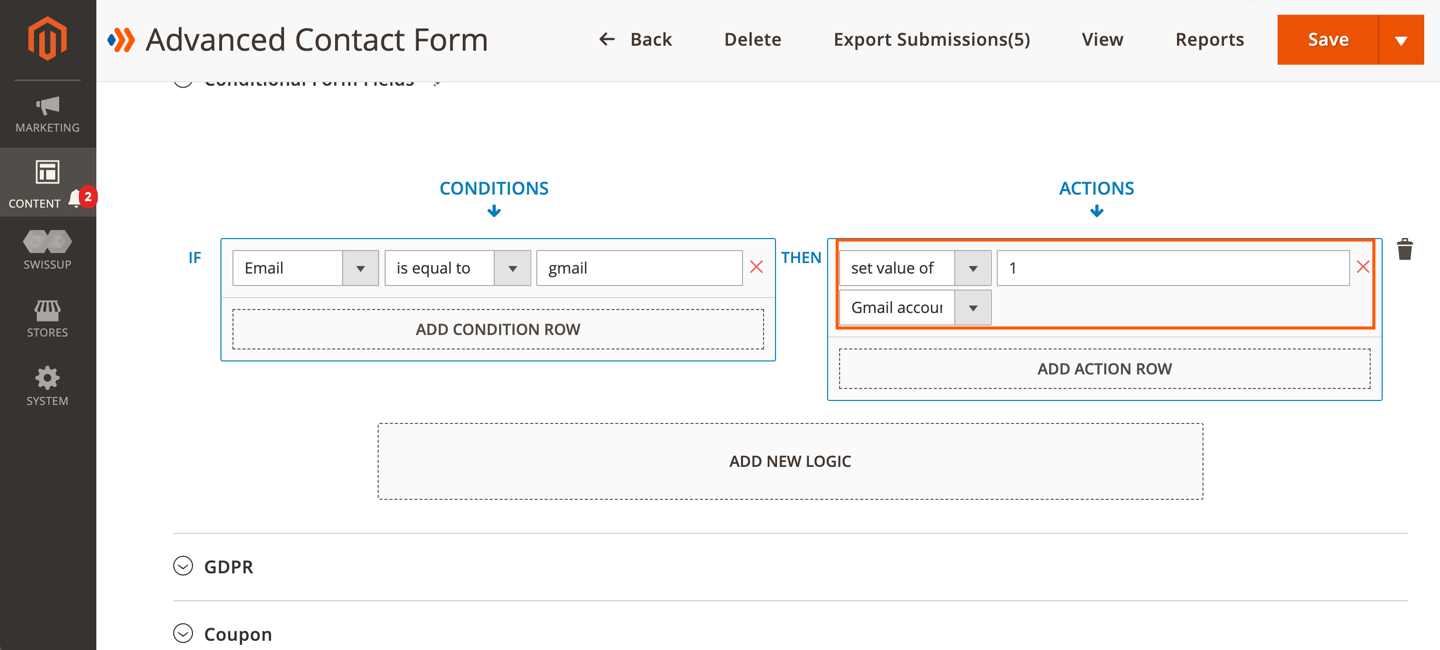
The logic here is: if the email that customers fill in the “Email” field contains “@gmail”, then we will automatically tick the “Gmail Account?” field.
5. Star Ratings Field
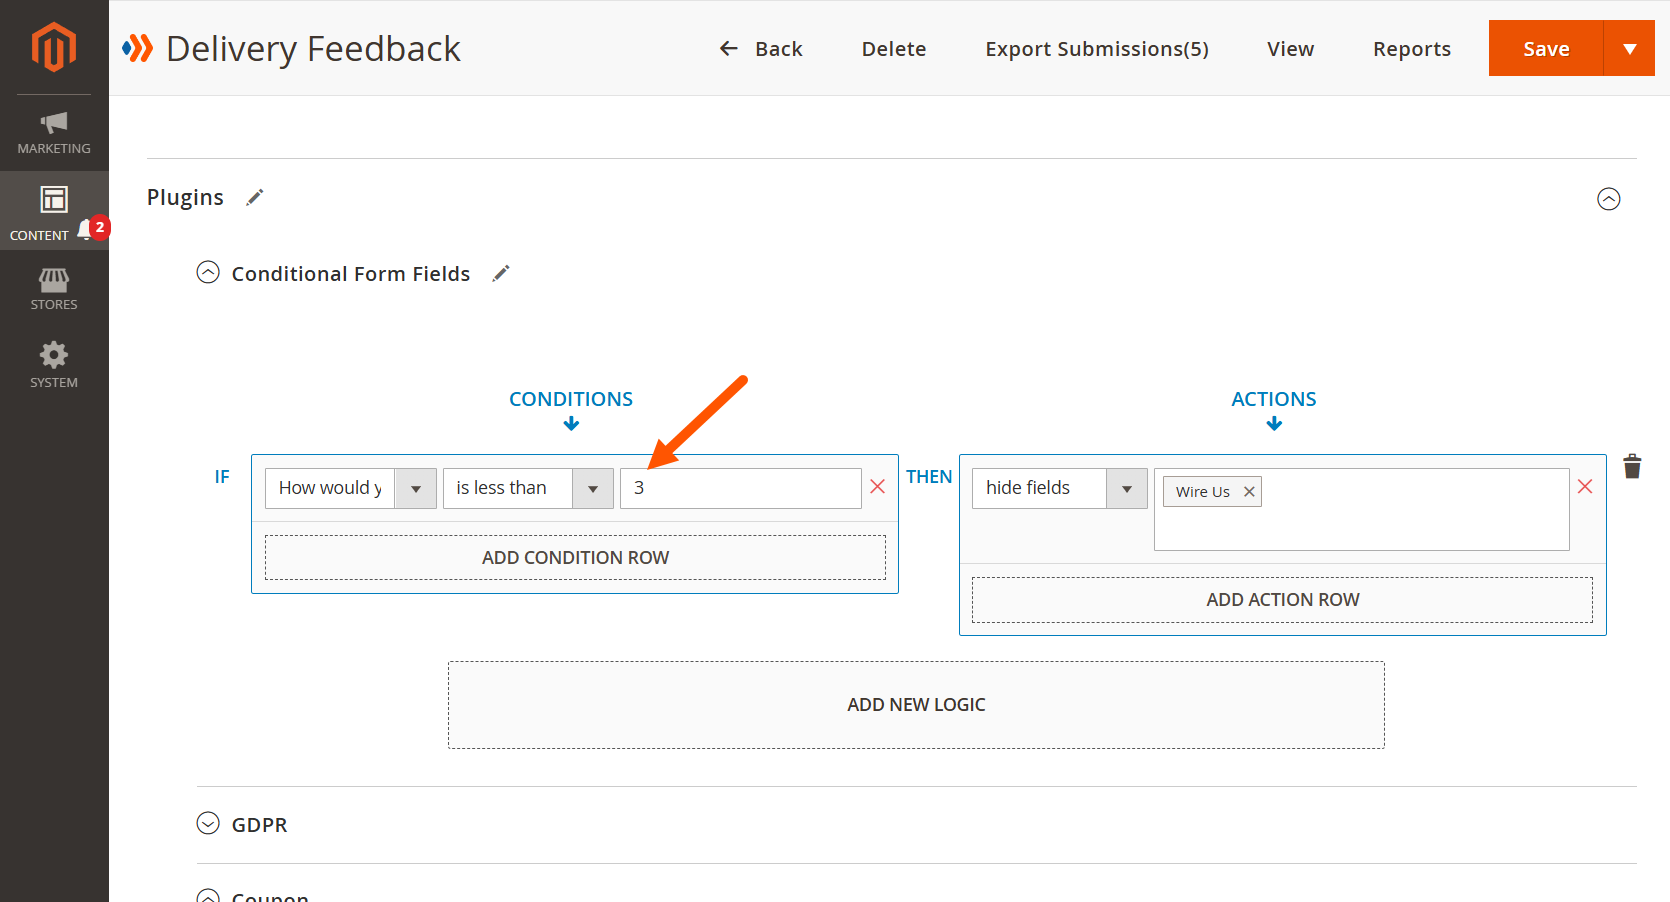
The value you use in conditional logic for this kind of field will be a number, like this:
6. Fields with No Label
As we mentioned above, when you want to choose a field to make conditional, you will select from a drop-down menu. The fields are listed in the menu by label that you decide in their settings. But for the fields that have no label, what is displayed in the drop-down menu is their default names.
Let’s look at this example:

In the above image, “Gmail Account?” is a single checkbox field. The settings of this field in the backend look like this:
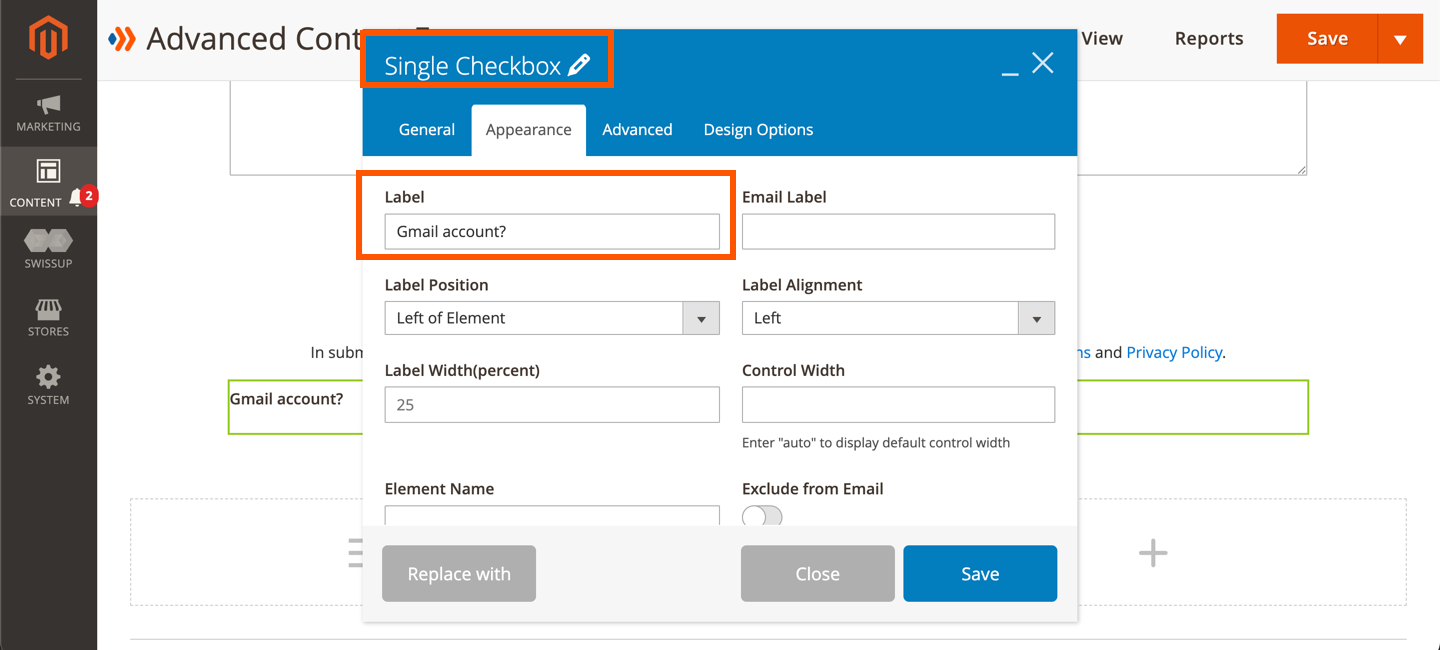
As you can see in the image, we enter the Label field with “Gmail Account?”. When you set a logic for this field, the “Gmail Account?” label will appear in the drop-down menu like this:
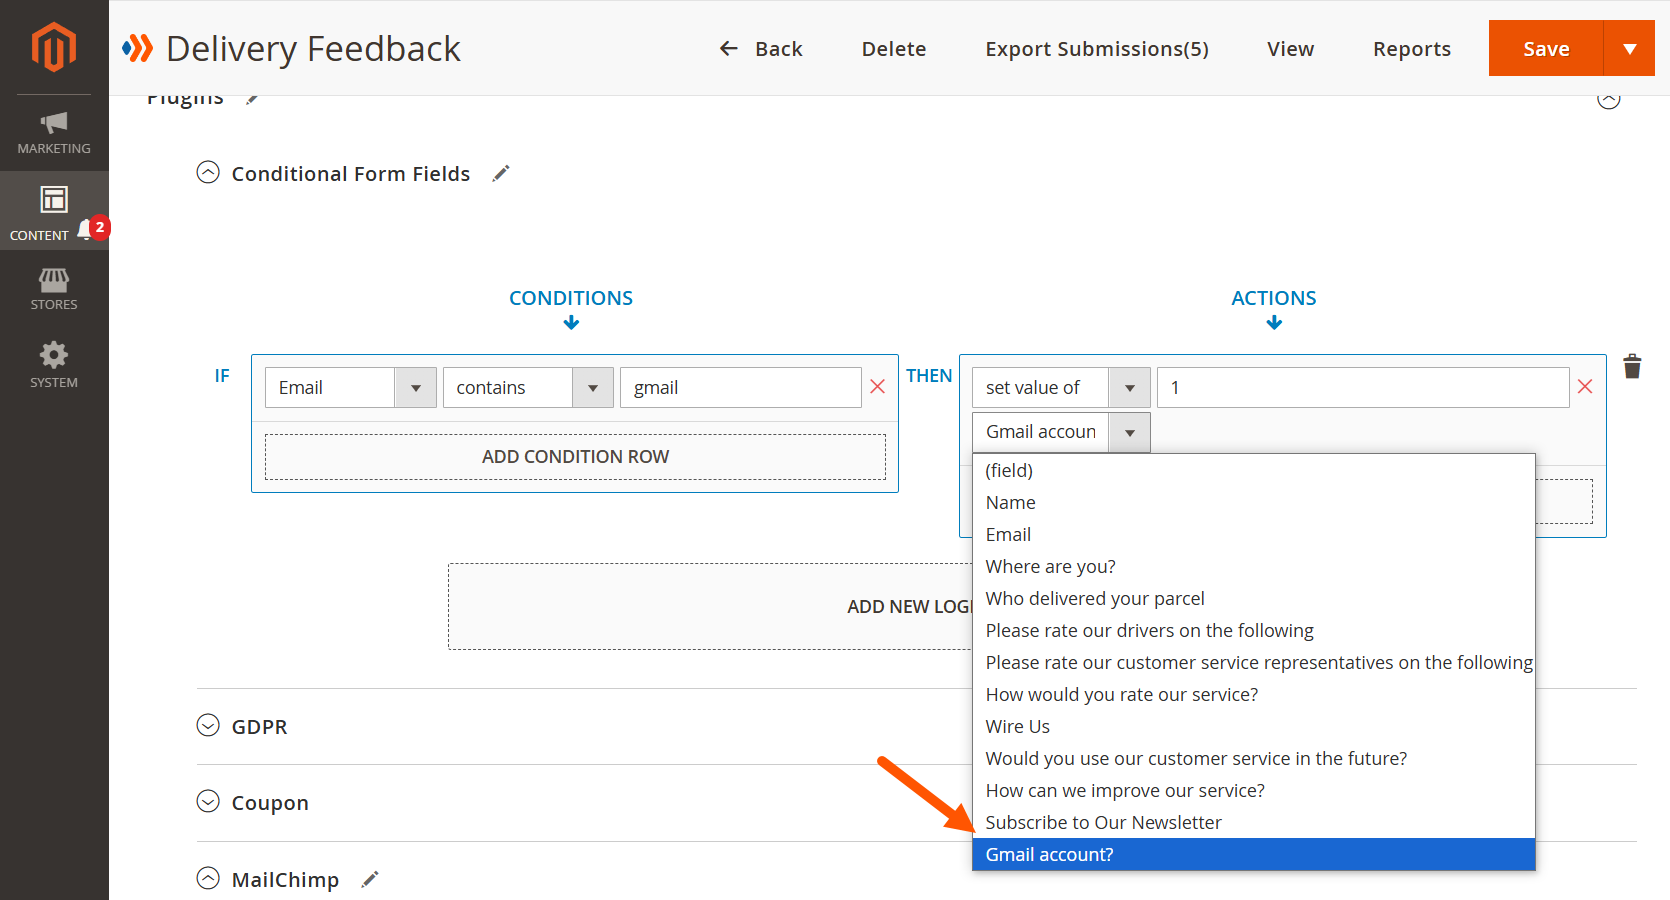
However, if we do not enter the label for this field, like this:
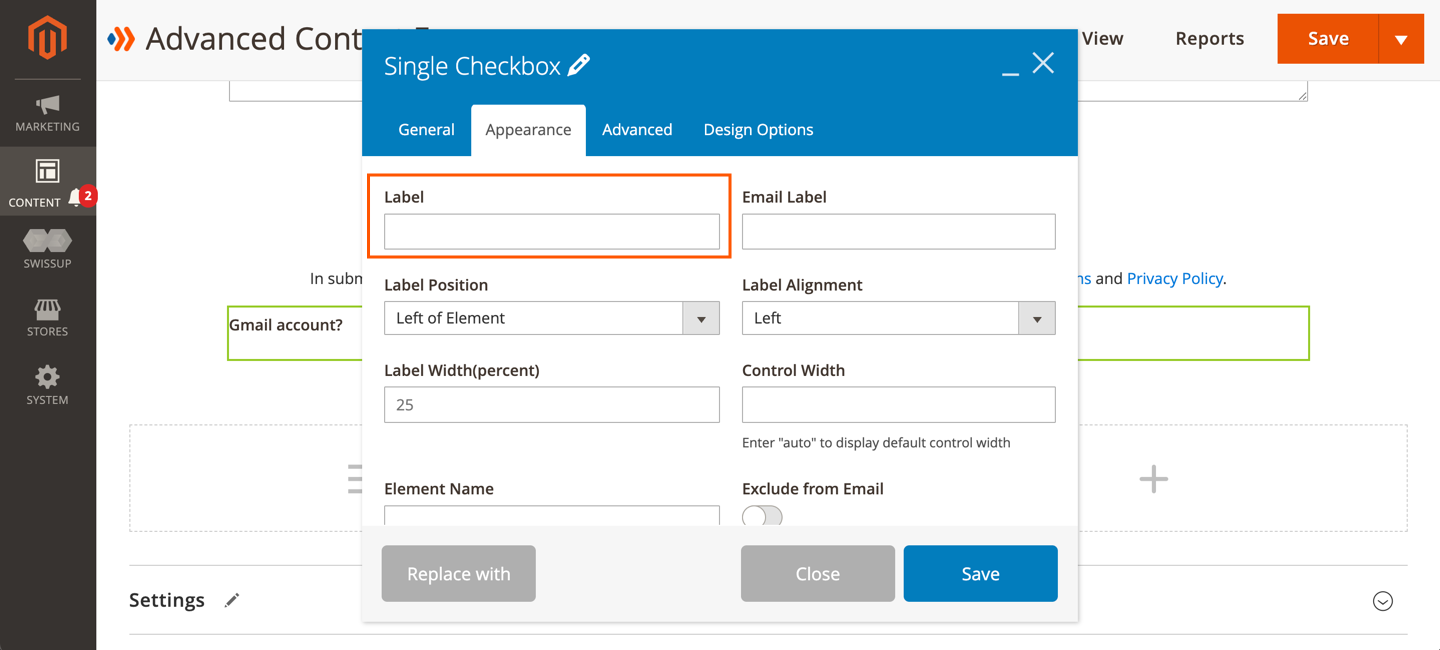
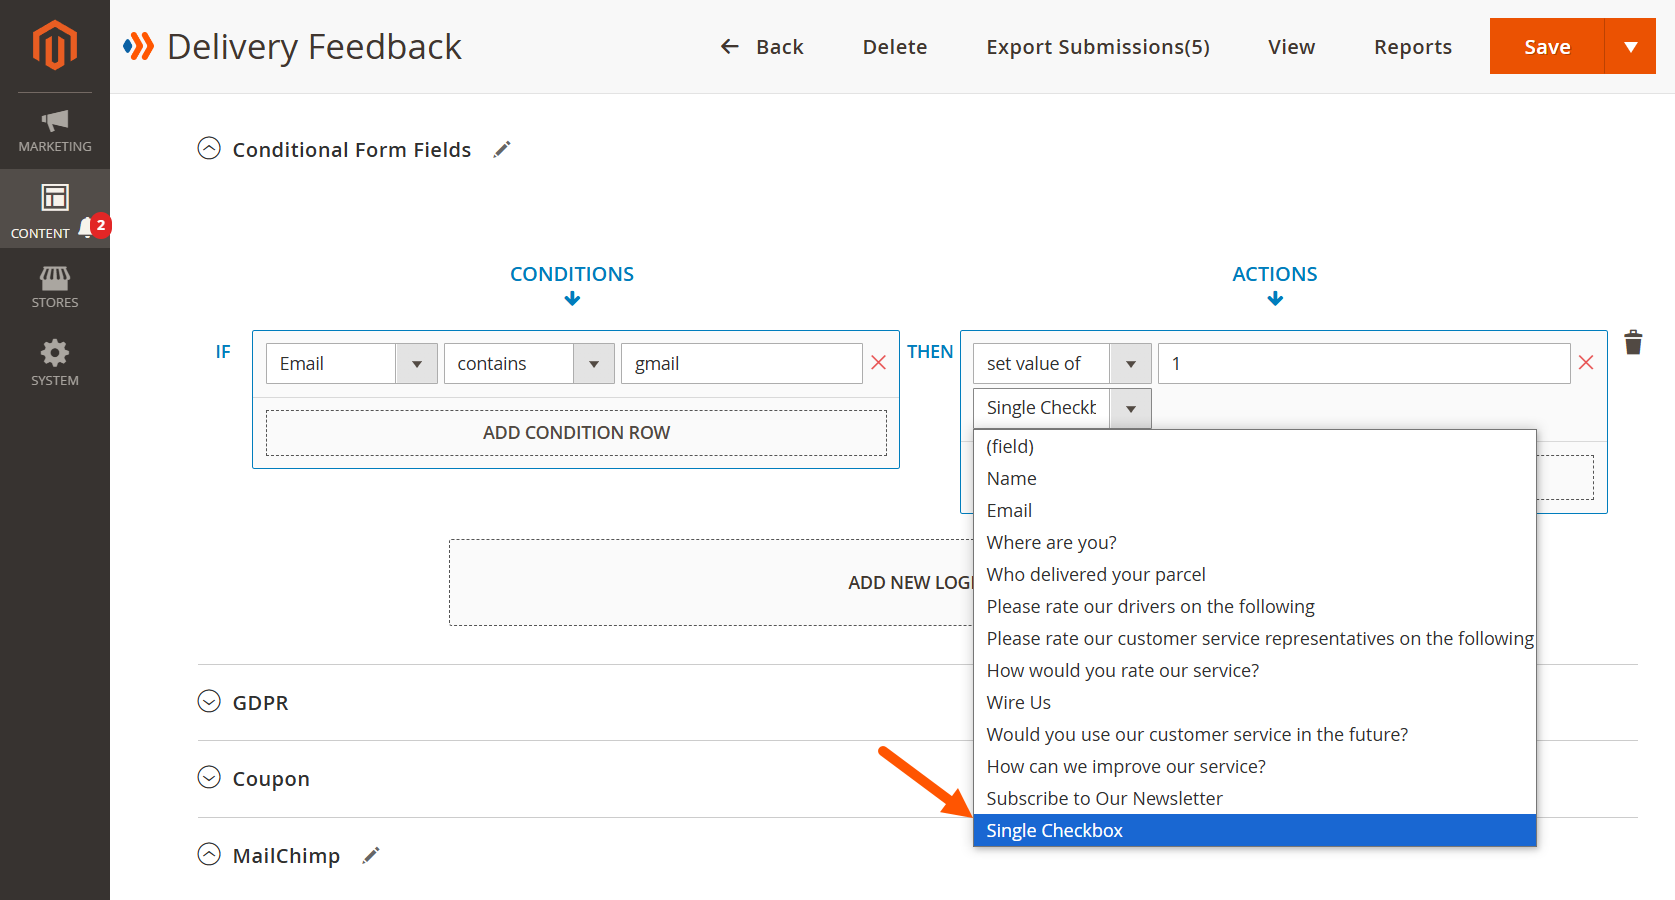
What will be displayed in the drop-down menu? It is the default name of this field that you can see in the header of the field settings (in this example, “Single Checkbox”). The logic will be like this:
To Sum Up
We hope that this detailed tutorial will be useful for you when using our Smart Conditional Logic plugin for your form. If you need any support, feel free to contact us via [email protected].
 Magezon Blog Help Merchants Build Comprehensive eCommerce Websites

