 Magezon Blog Help Merchants Build Comprehensive eCommerce Websites
You’re probably familiar with a traditional button that redirects visitors to another page. But there’s another type of trigger appropriate for displaying important messages, additional content, or forms on a page: popup trigger on button click.
If you’re using or want to use Magezon Page Builder to add a button that triggers an on-click popup, we’re excited to say that our extension supports this feature without the coding skills required. And in this tutorial, we will show you how to do this step by step.
Table of contents
Create & Target Popup to a Button
NOTE: To insert a button triggering a popup in Magezon Page Builder, you need to purchase and install the Button Modal plugin. This feature will be integrated into the Button element.
1. Add a Button
The first step is to insert a Button element into your content. Open the Modal tab in the element settings and turn on the Enable Modal toggle to activate the popup trigger for the button.

2. Create Popup Content
From the Type option, select a way to add popup content: Custom Content & Inline Element.
If you choose Custom Content, you’ll add content for the popup by using Magento WYSIWYG editor:
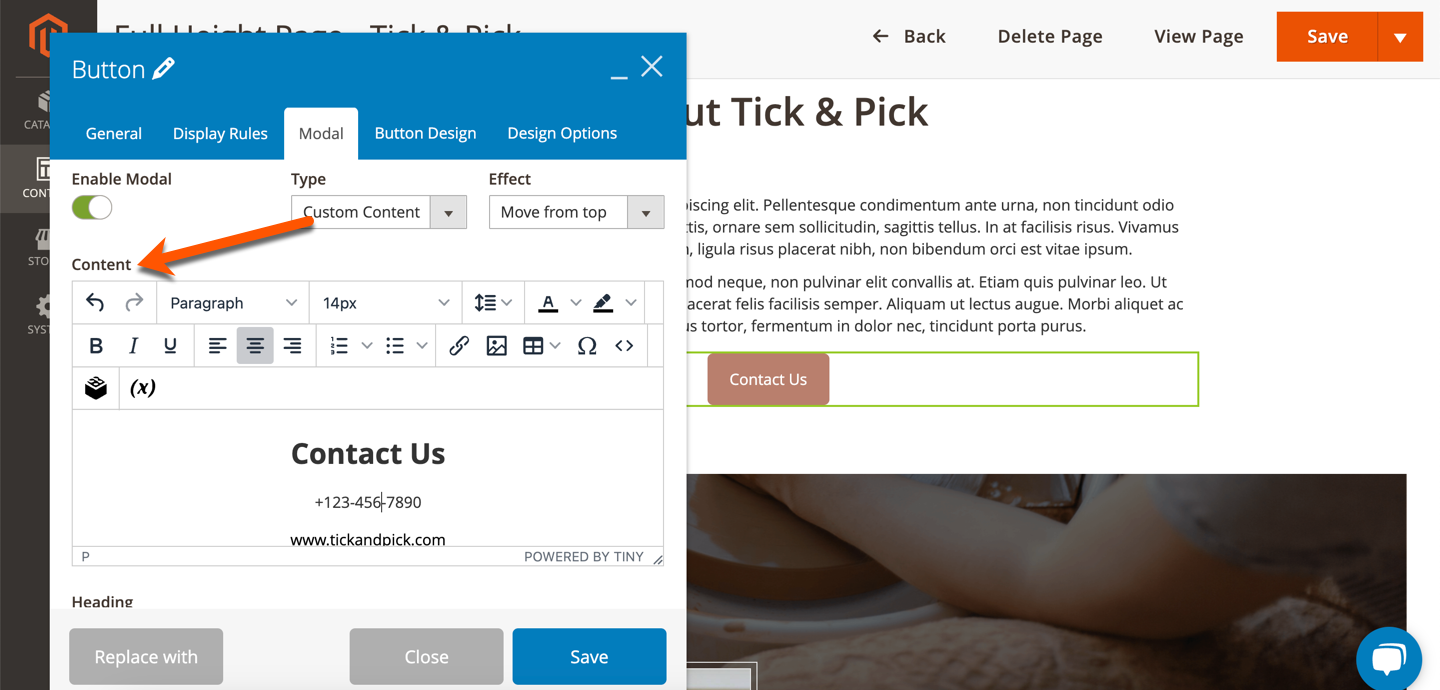
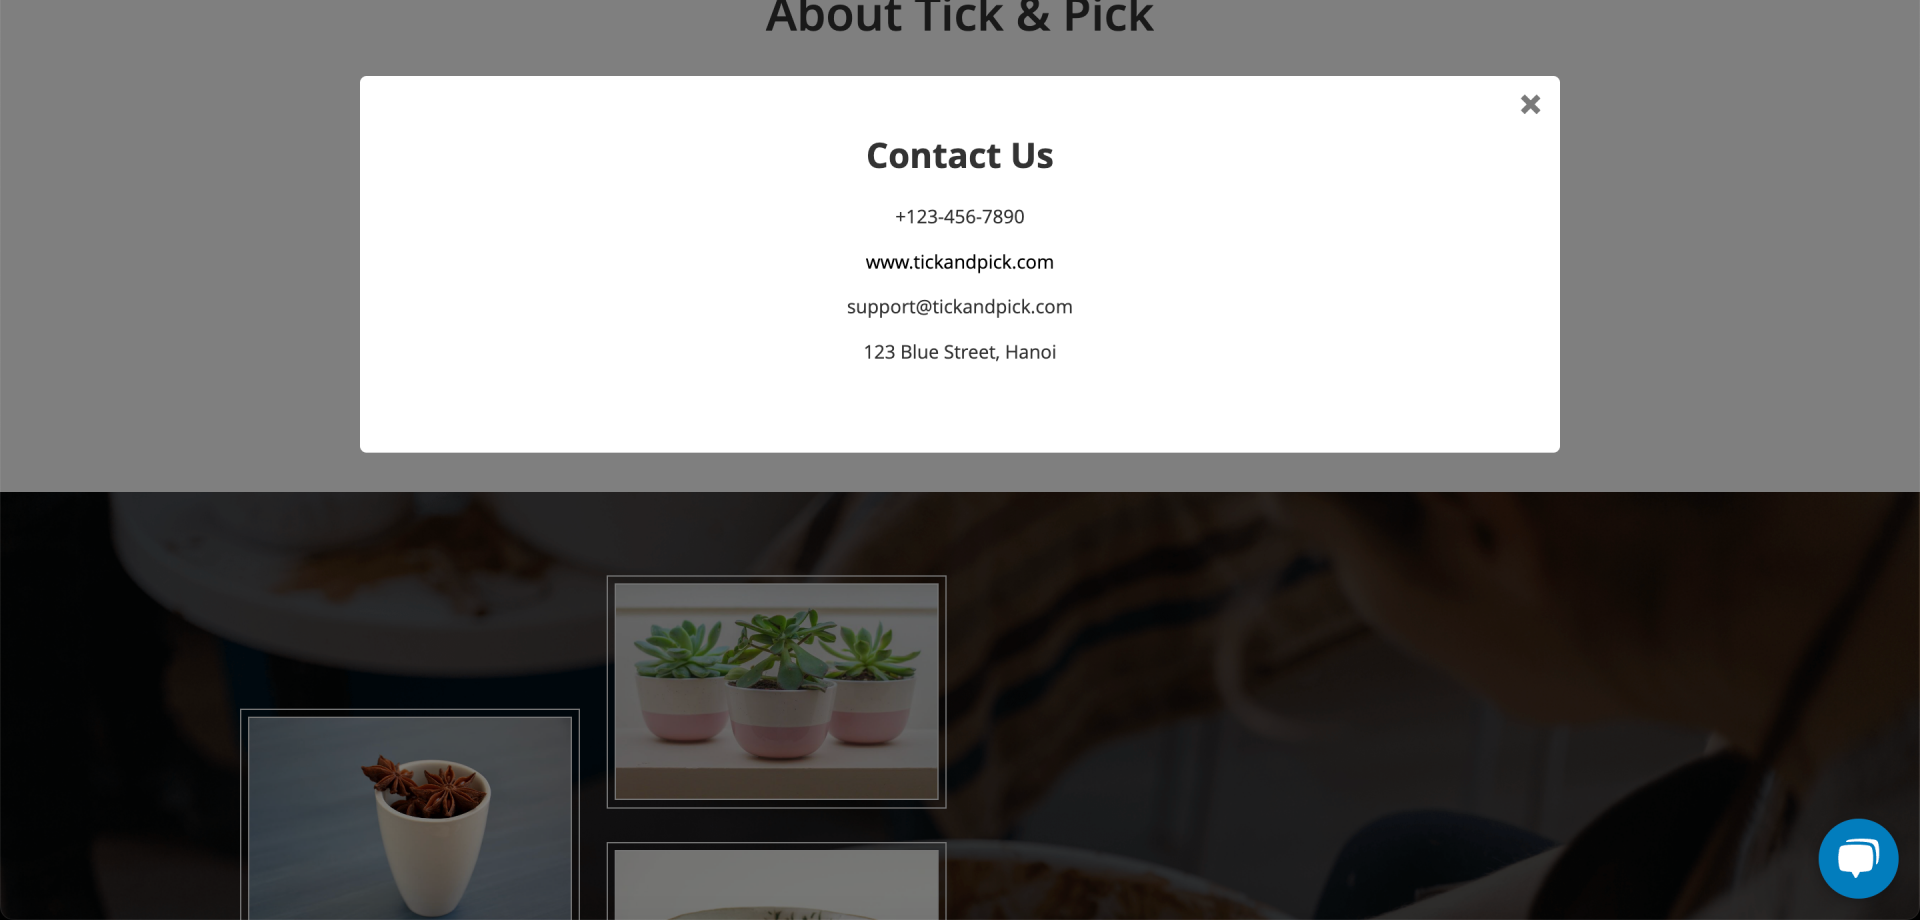
The content in the editor will look like this in the popup:
If you choose Inline Element, you can create popup content using 50+ elements from Magezon Page Builder.
Below is how this type works:
– Step 1: In the builder section, add any elements from our 50+ elements to create the content that you want to display in the popup. It can be Text Block, Single Image, Video Player and so on. Besides, you can create multiple columns easily.
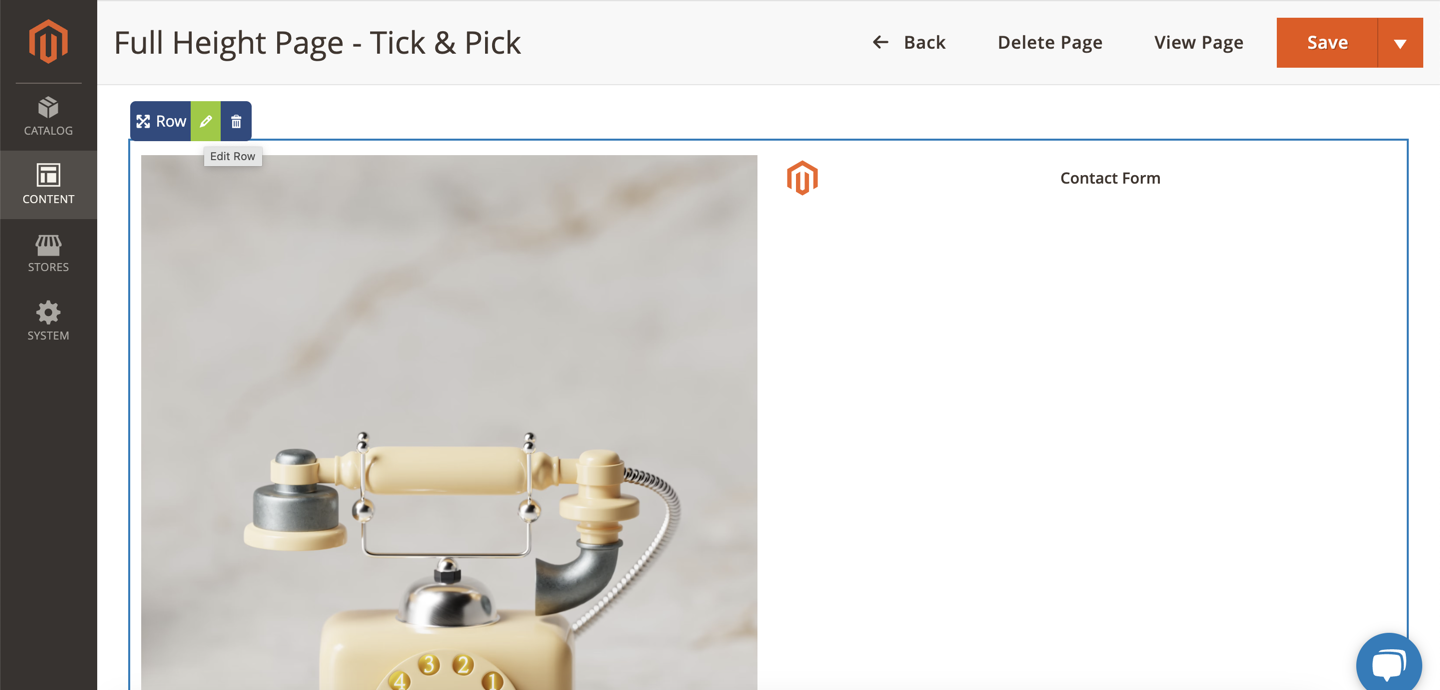
In the above image, we created 2 columns with the first one containing a Single Image element and the second one containing a Contact Form element. The Contact Form element is used to display Magento default contact form.
– Step 2: Open settings of the elements that you want to show in the popup window. Find the Element ID field and enter an ID for each element. Also, you need to enable Hide on Page Load so that these elements are not visible within your content on the frontend:
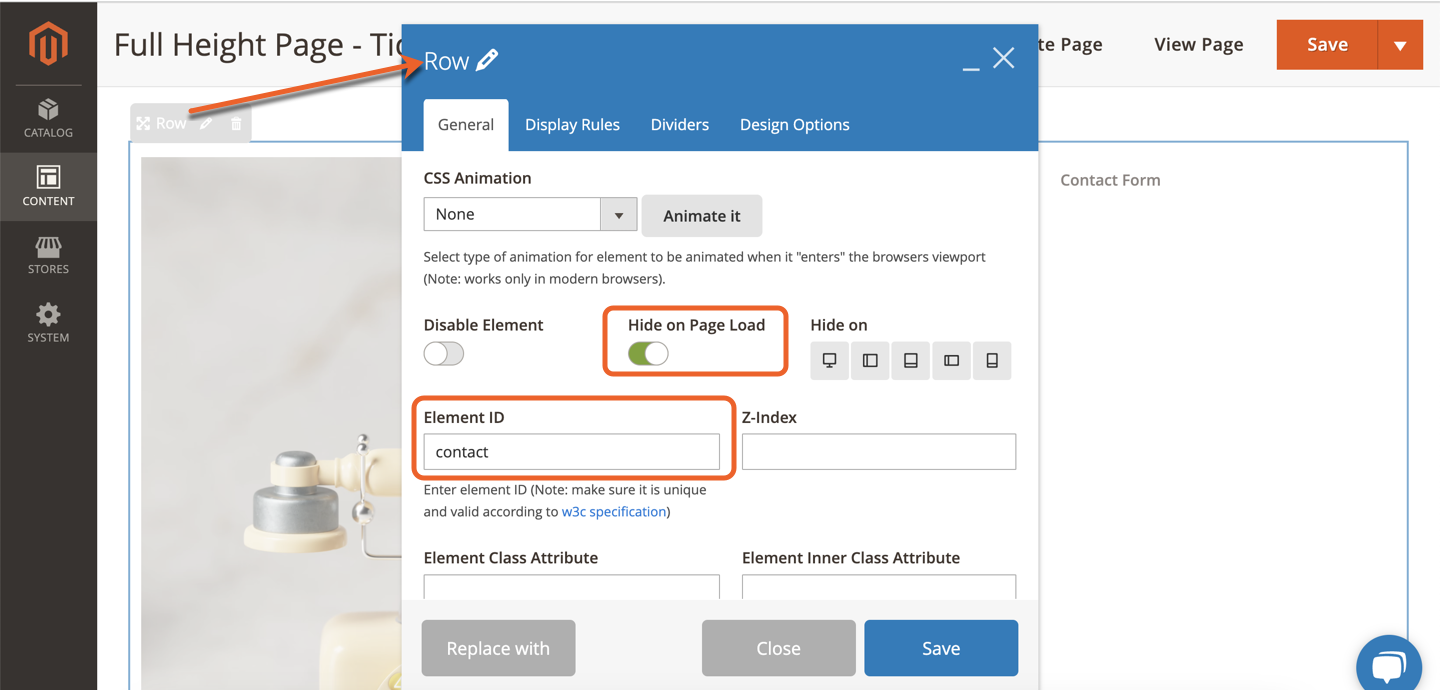
NOTE: If you have a container element such as Row, Section, Tab, etc. that contains other elements, simply enter an ID for this container element. No need to specify the ID for each element within it.
For example, as we mentioned above, we created 2 columns with the first one containing a Single Image element and the second one containing a Contact Form. Here, we just need to open the settings of the Row containing these 2 columns and enter an ID for the row, e.g. contact.
– Step 3: In the Button element settings, open the Modal tab. In the Element IDs field, enter IDs of the elements that will be displayed in the popup. In this example, we enter contact.
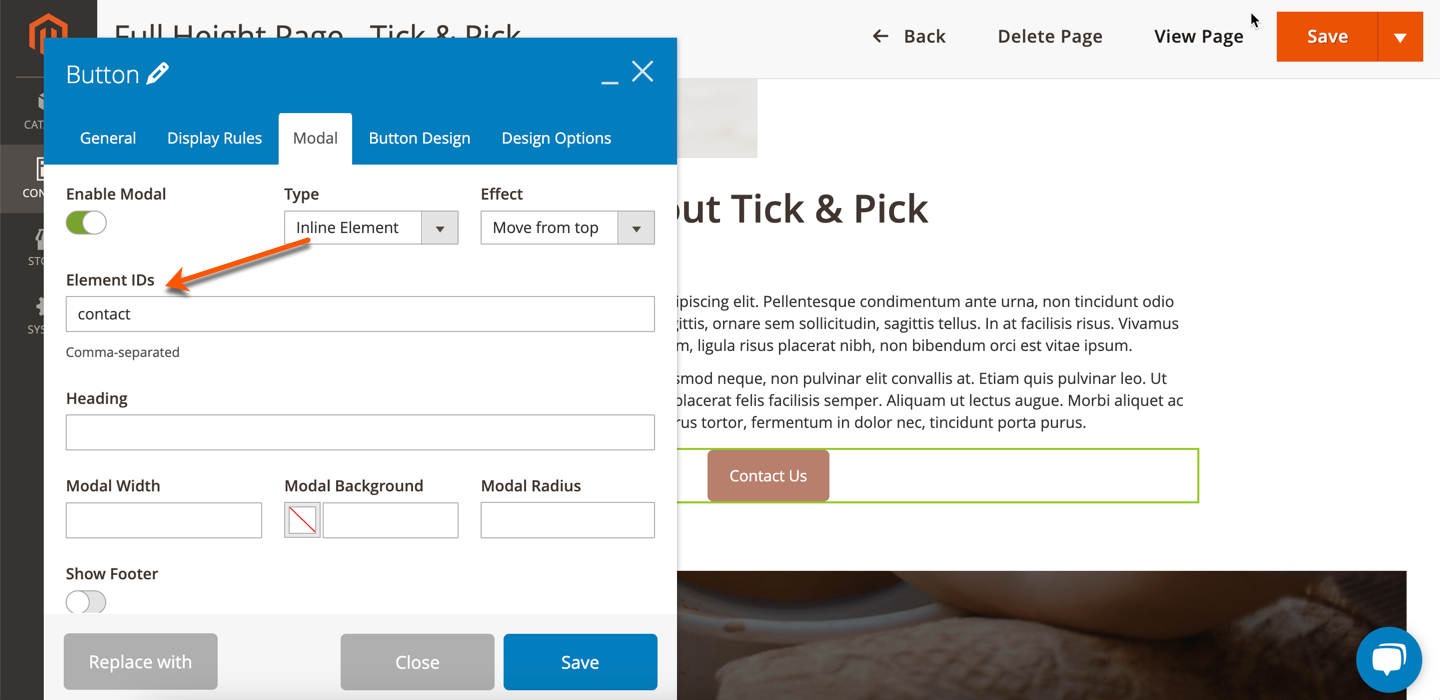
Please note that you can add multiple element IDs by separating them with commas, e.g. contact1,contact2.
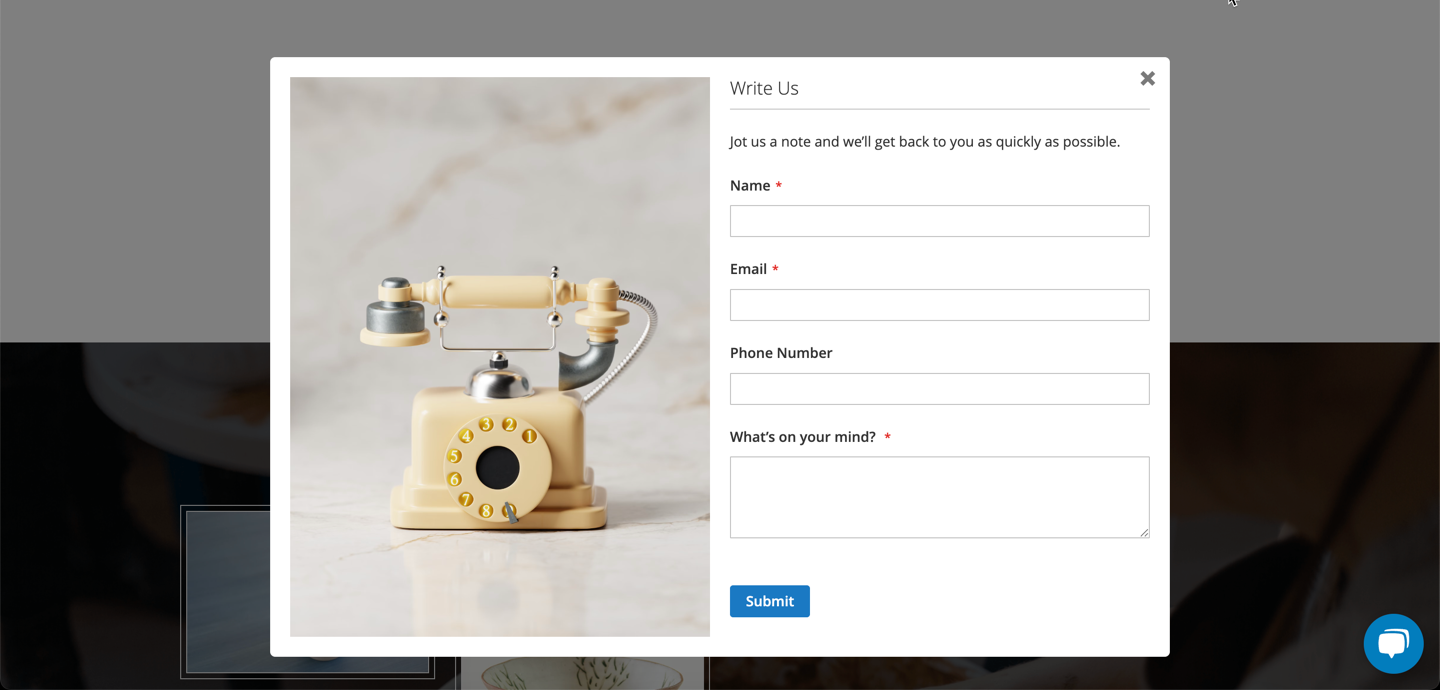
The row in the example will look like this in the popup:
3. Customize Popup
Various options are offered to let you customize the look and feel of your popups:
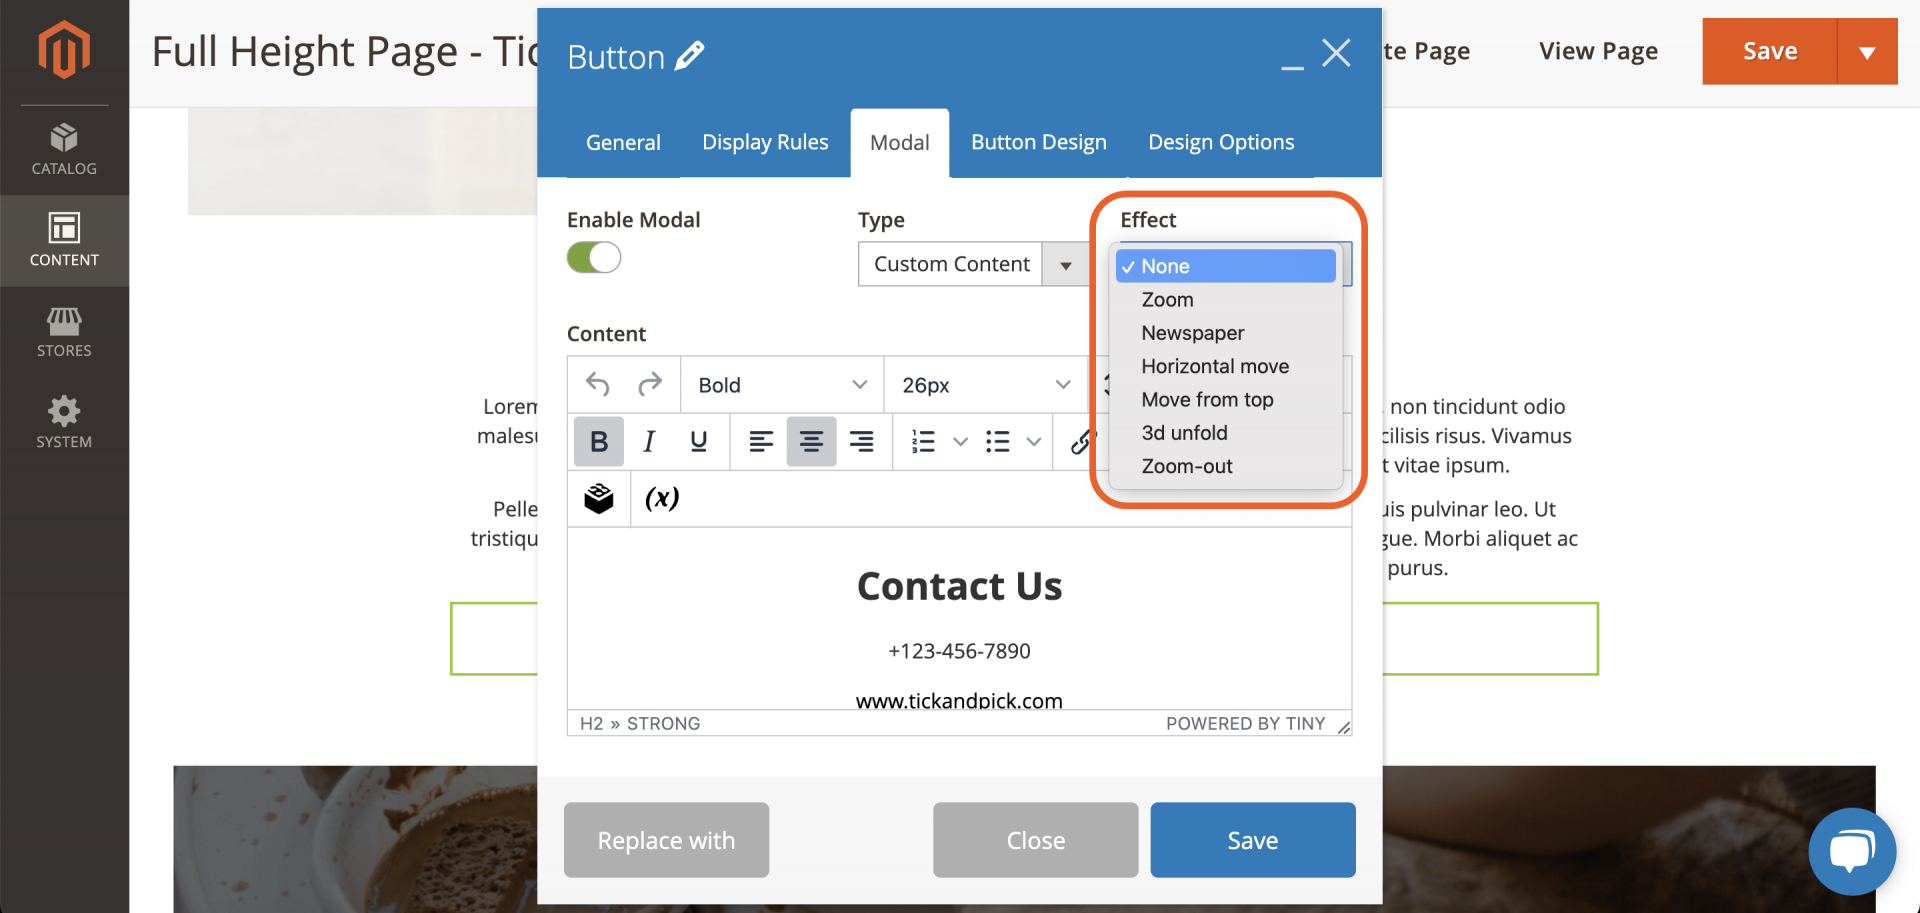
- Effect: Choose from 6 animation effects to make the popup appear in a more lively way.
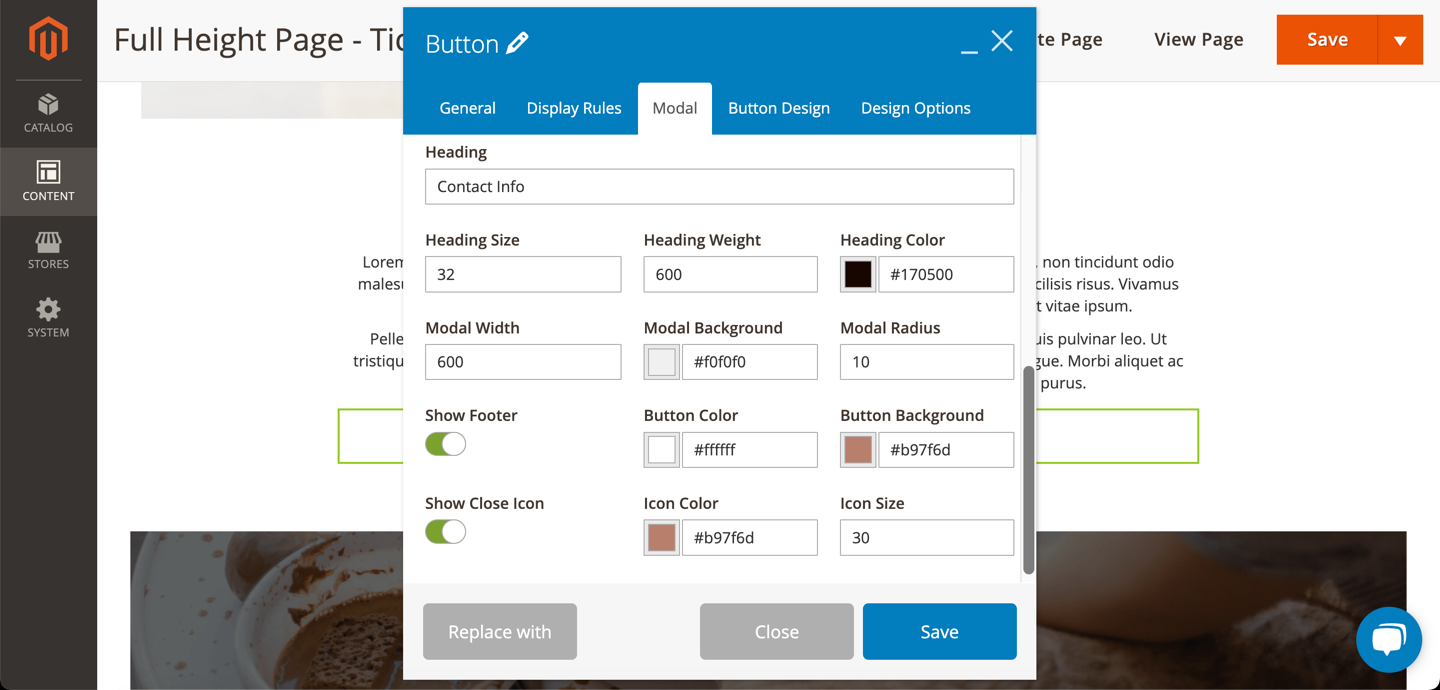
- Heading: Enter a heading for the popup. If you leave this field empty, the header won’t be displayed in the popup, and you can’t see the below options including Heading Size, Heading Weight & Heading Color.
- Heading Size: Enter a font size for the heading (px).
- Heading Weight: Enter a font weight for the heading (px).
- Heading Color: Choose a color for the heading.
- Modal Width: Specify the popup width (px).
- Modal Background: Choose a color for the popup background.
- Modal Radius: Define the popup radius (px).
- Show Footer: Show/hide the popup footer.
- Button Color: Specify a color for the text inside the Close button.
- Button Background: Specify a color for the Close button background.
- Show Close Icon: Show/hide close icon.
- Specify Icon Color and Icon Size.
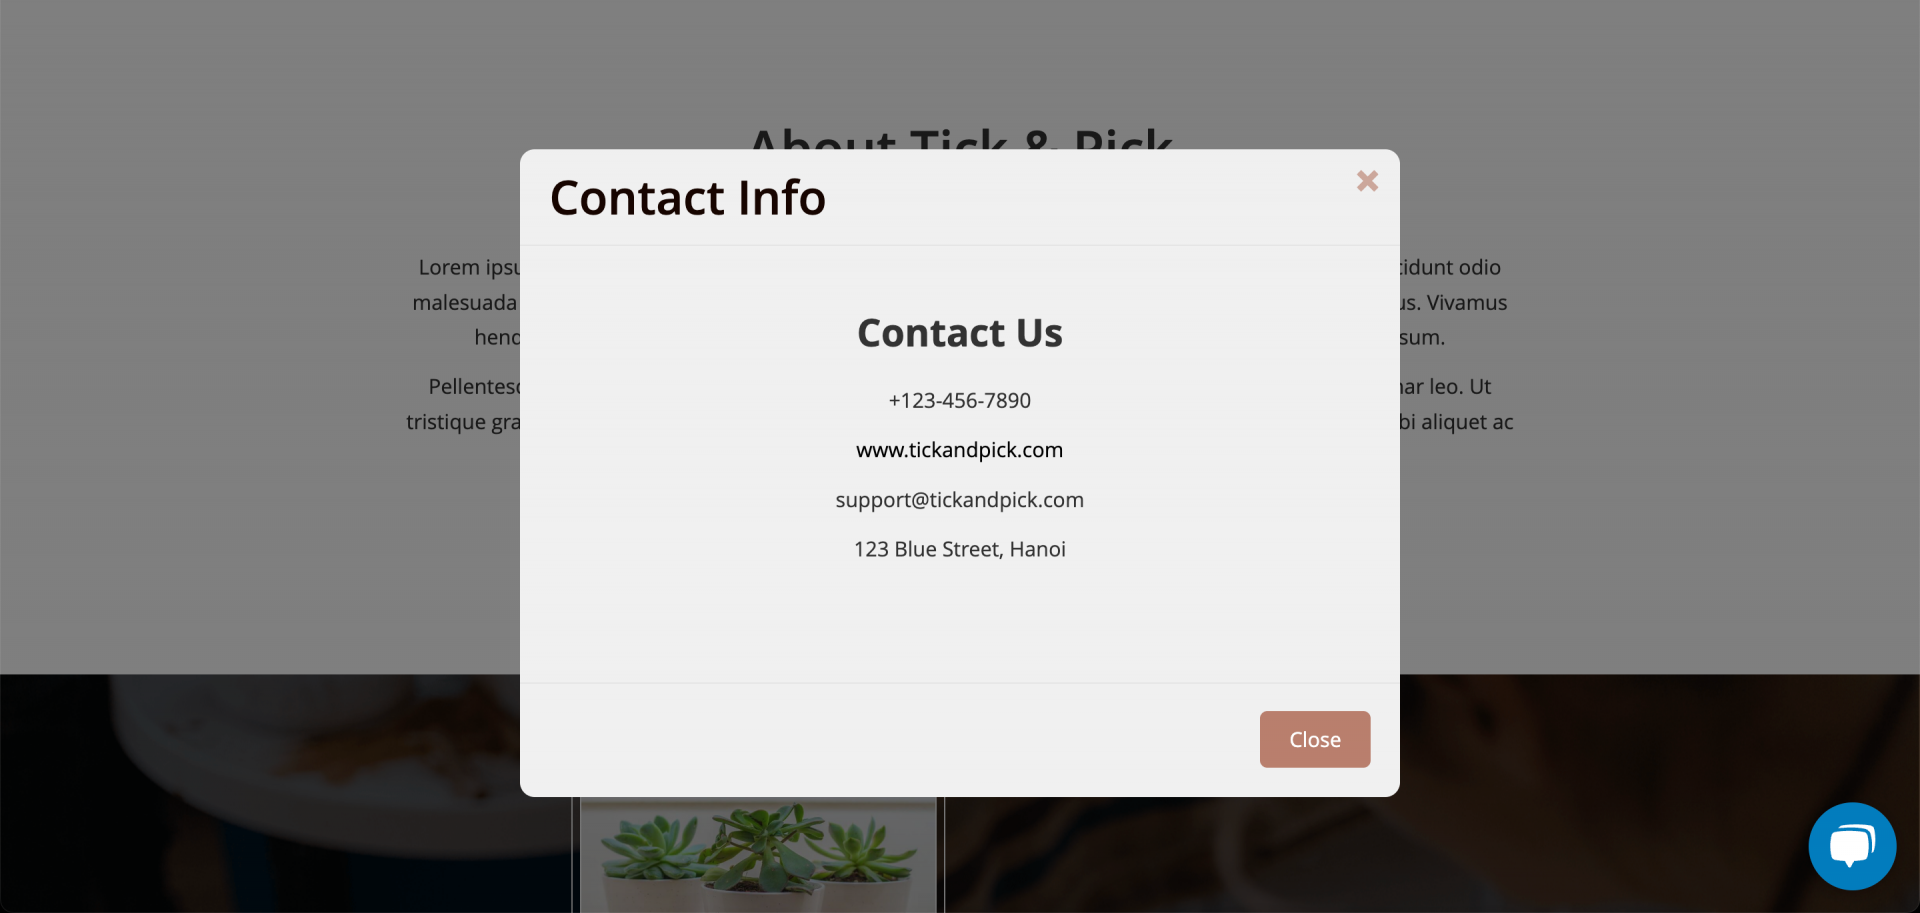
Here is how the customized popup looks on the frontend:
To Sum Up
You’ve been walked through a detailed guide on how to add a button that triggers a popup in Magezon Page Builder. If you have any questions, don’t hesitate to contact us via [email protected].
We also have a list of tutorials that help you use our Page Builder most effectively. Don’t forget to check them.


