 Magezon Blog Help Merchants Build Comprehensive eCommerce Websites

Magento 2 WYSIWYG editor is one of the most powerful features in Magento 2. This post will show you what it is, the difference between TinyMC3 and TinyMCE4, and how to enable, disable Magento WYSIWYG editor.
What is Magento 2 WYSIWYG?
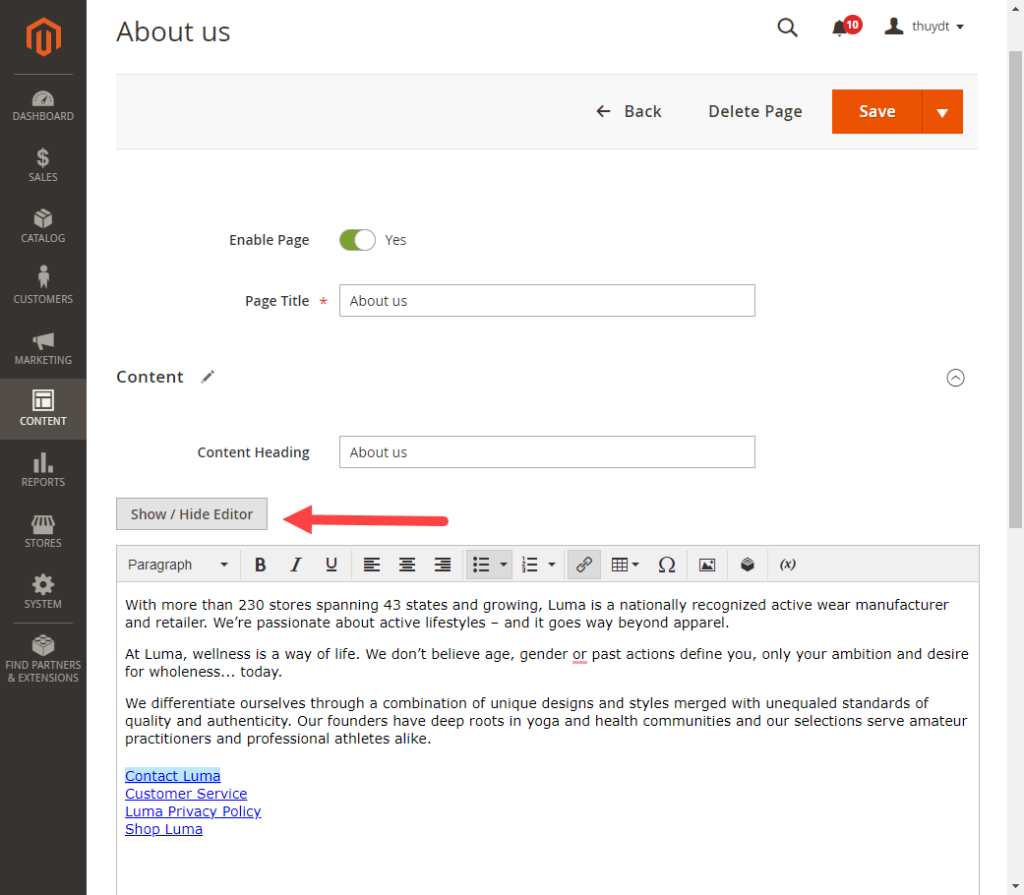
Magento 2 WYSIWYG (short for What You See Is What You Get) is a Magento built-in editor that allows users to create content in the back-end without tampering with code. Users will be able to see the result instantly, as the front-end.
To use/hide the Magento 2 WYSIWYG editor, click Show/Hide Editor button in the editor toolbar’s upper-left corner.
From Magento 2.4 version, TinyMCE 3 is replaced as the default editor by TinyMCE4.
To see the difference between TinyMCE4 and TinyMCE3, check the following images.
TinyMCE3 is complicated with multiple settings. Check TinyMCE3 detailed function in Magento User Guide for Merchants.

TinyMCE4 is simplified in both design and function. This new version makes the editor more effective and less unwieldy than TinyMCE3.

With TinyMCE4, Magento 2 WYSIWYG editor toolbar shows you many features, including:
- Text formats
- Text size
- Line Height
- Text color
- Highlight color
- Bold
- Italic
- Underline
- Alignment
- List options
- Bullet options
- Add link
- Add image
- Add table
- Add widget
- Add variables
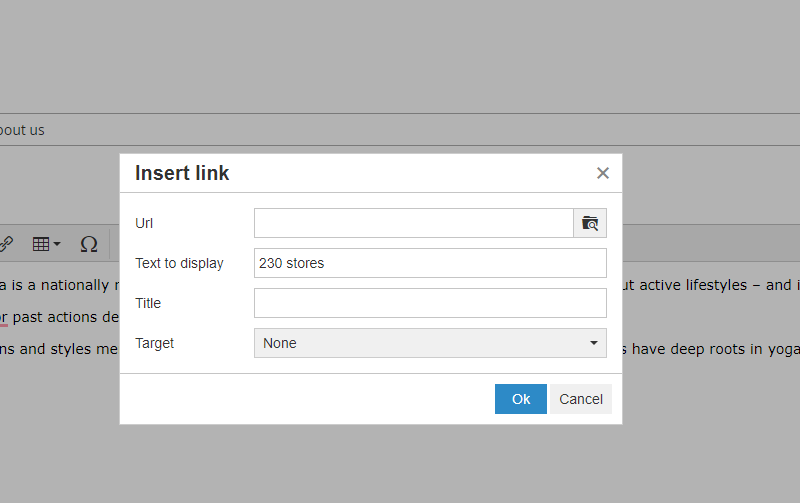
Let’s see some real examples when you insert a link, an image, a widget, and a variable in these images below:
| You may also like: Magento CMS: An In-Depth Overview Beginner‘s Guide to Magento Media Folder How to Add Top Link in Magento 2 How to Create and Insert Magento 2 Block in CMS Page |
Insert a link in Magento 2 WYSIWYG

Insert an image in Magento 2 WYSIWYG
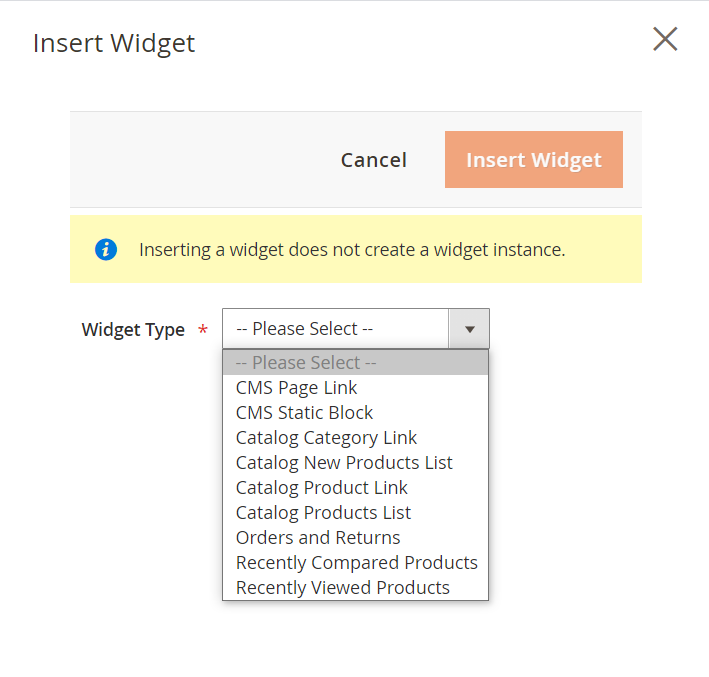
Insert a widget in Magento 2 WYSIWYG
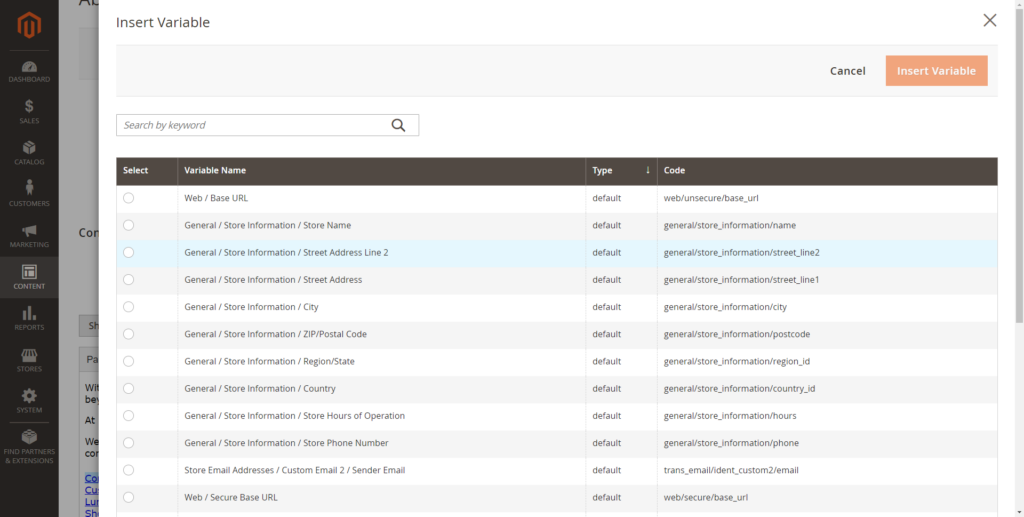
Insert a variable in Magento 2 WYSIWY
Check out Magezon Page Builder, the intuitive drag-and-drop editor that helps you effortlessly build stunning content in minutes. No lines of code needed.
Magento 2 Enable WYSIWYG Editor in 6 Steps
Step 1: Click Stores > Settings > Configuration.
Step 2: Under the General tab, hit Content Management.
Step 3: In the WYSIWYG Options area, set Enable WYSIWYG Editor to Enabled by Default, Disabled by Default, or Disabled Completely.
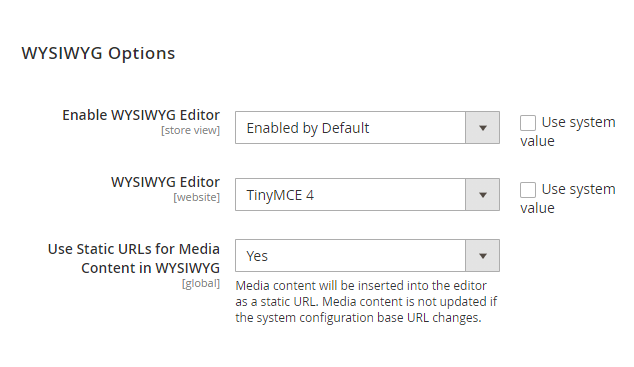
Step 4: In the WYSIWYG Editor field, the default value is TinyMCE 4.
Step 5: Choose Yes or No in Use Static URLs for Media Content in WYSIWYG filed.
Step 6: Click Save Config.
Conclusion
Now you know how to enable/disable Magento 2 WYSIWYG editor already. We have more tutorials for you in Magento Tutorials Series.
Also, if you’re looking to find solutions to optimize your Magento store, visit Magezon. We’ve developed and provided diverse robust extensions in various aspects like Sales, Products, Orders, Customers, etc. at reasonable prices. Check them out below!

Optimize Your Magento Store With Powerful Extensions
Looking for fast, efficient and well-coded extensions to build or optimize your Magento stores for sales boosting? Then visit Magezon website and grab necessary add-ons for yours today!

