 Magezon Blog Help Merchants Build Comprehensive eCommerce Websites

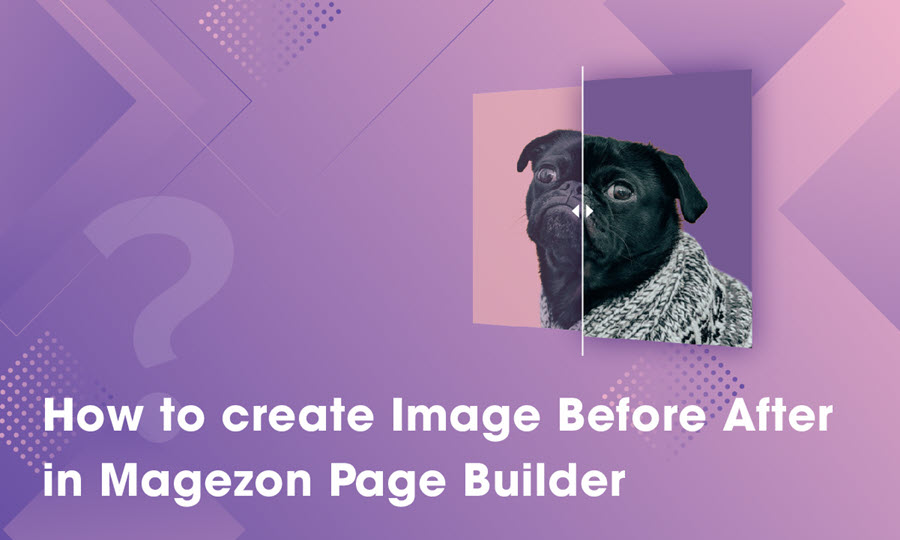
Assume that you are a beautician and you are looking for the best way to showcase the differences between before and after using your services on your Magento website. How do you display the 2 images? Normally it’s ok if there are 2 static images, but it’s rather cool if you display side by side comparison of two identical images with Image Before After plugin.
Note: Image Before After is a plugin of Magezon Page Builder extension, please install Magezon Page Builder before purchasing Image Before After.
So without further ado, let’s get started!
Table of contents
What is Image Before After Plugin?
Briefly, Image Before After is a plugin that gives users full control of showing 2 similar images with minor differences. That’s handy for comparing and accenting your website beautifully. With the plugin, you can easily highlight your product features.
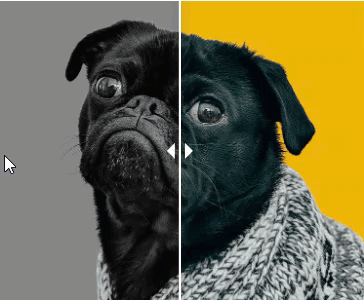
To understand this concept better, take a look at the examples below :
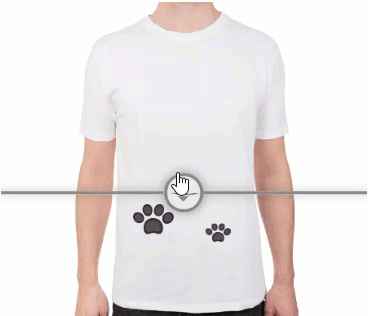
It’s such an impressive way to make the comparison outstanding, isn’t it? Now we will give you a fully comprehensive instruction of how to create an Image Before After right below.
How to Use Image Before After Plugin
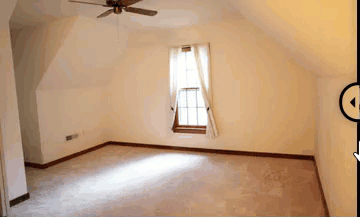
To make it simple and easier to understand, we provide you with an example of an Image Before After in Magezon Page Builder and go into detail about how to create one.
Take a look at its backend interface
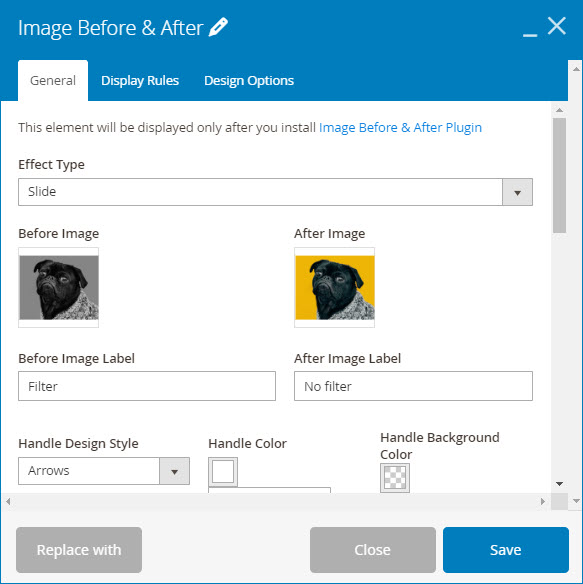
When it comes to creating an Image Before After like this, we should take into consideration 4 factors which are effect types, before image & after image, label and handle.
1. Effect Types
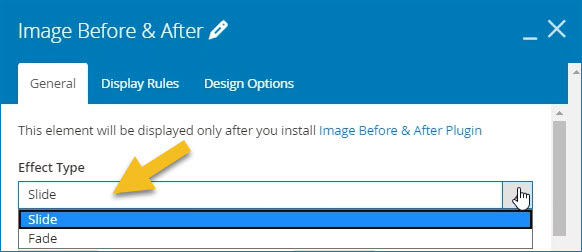
Effect types allow you to choose which effect will be applied when you hover your mouse over the image. In this case, my effect type is “slide”.
Note: If you choose the “fade” effect type, there will be one more “Image Fade Transition Speed” customizable option.
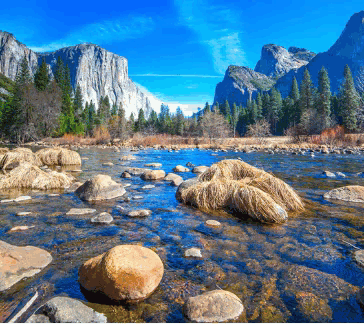
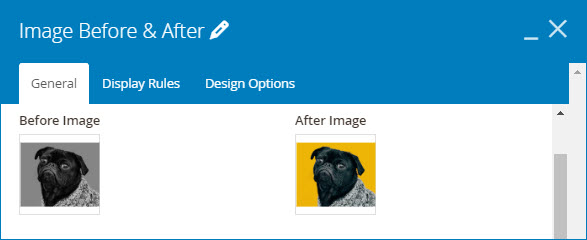
2. Before Image & After Image
Upload and select the before and after images you want to display.
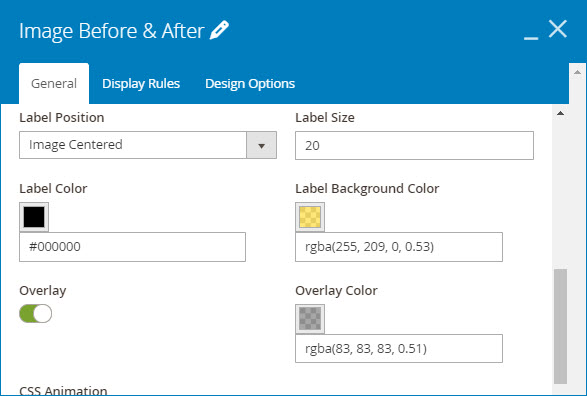
3. Customize Image Label
Type label for each image. The label will go along with an overlay color and they only appear when you hover onto the image. That means there’s no label and overlay color when you swipe right/left the handle. Also, you can customize the overlay only if you put a label on the image.
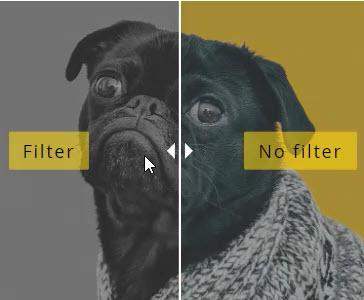
Labels and overlay in Image Before After
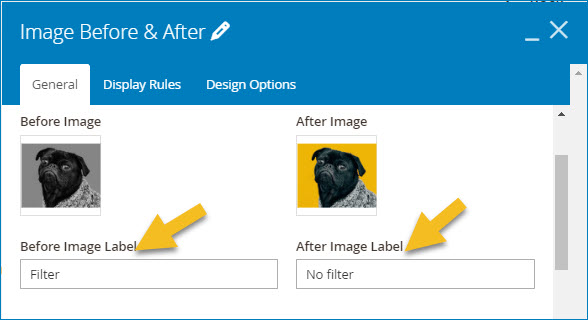
Type labels in Before/After image label fields
Scroll down to customize more label options like label position, size, color and background color. If you don’t want to overlay your image with a color, toggle the options for overlay.
4. Customize Handle
In this example, my Image Before After is designed with “Arrow” handle style, “white” handle color, transparent background handle color.
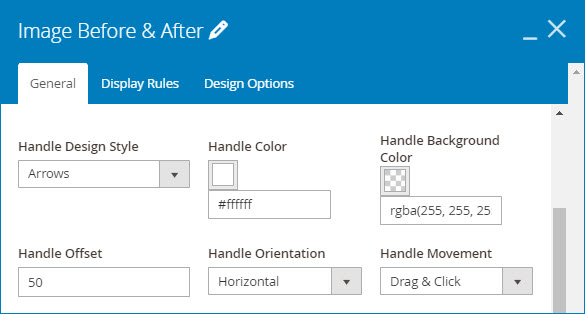
I would like my Image Before After to be 50 offset. The offset rules the displayed proportion of the before image, typing 50 in offset field means 50% of the before image will be displayed when visitors loaded the page. Next, “horizontal” orientation and “drag & click” handle movement will definitely perfect my image. Of course, there are still tons of other flexible styling controls for users to explore.
| Learn more about Magezon Page Builder elements: How to Create an Image Gallery in Magezon Page Builder Magento Image Carousel: Create With Magezon Page Builder |
Conclusion
We hope that this tutorial will broaden your understanding of how to use Image Before After plugin in Magezon Page Builder. Feel free to leave us some comments in the comment section, or visit our Magezon Page Builder tutorial series to dig further about Magezon Page Builder.

Try FREE Magezon Page Builder demo today
Easily create beautiful, engaging Magento website in any style whenever you want without relying on developers or designers. Just by drag & drop.


